


[BR] W9 and 1099 Handling for Vendors
Document status | IN PROGRESS |
|---|---|
Last Updated | // |
Document owner | |
Designer | |
Dev Team |
|
Design Link | https://www.figma.com/file/RJx92dVXN0nzn5onBZqtgY/Accounting-W9-Handling?node-id=0%3A1 |
Design File | |
Related Documents | |
Version | V1: // |
Overview
For tax purposes brokers need to keep track of payments made to carriers. In order to comply with Tax law, each carrier must submit information about their business to the broker. The required information is submitted to the broker via a completed W9 form.
At the end of the year, the broker uses that information, along with financial records, to issue a tax document to each carrier that was paid by the broker that year, which describes the payments made to that carrier. This document is called a “1099”.
The 1099 is generated by Quickbooks. In order to generate this document, quickbooks requires the following data:
The Carrier’s business and tax information (which is provided by the carrier to the broker via the W9 form); and
The history of payments made from the broker to the carrier (already provided by the broker app and exported to quickbooks)
The Problem - W9 Data Collection is Manual
Currently
At end of year, our company needs to a generate at 1099 for all vendors, unless they
Are corporations; or
Paid less than $600;
LLC that’s taxed like a corporation; e.g., (S) or (C) corps
This is done via quickbooks. But quickbooks needs the carrier's business information, which is included in the W9 forms that carriers submit to Zuum.
Currently, this information is manually copied over from Zuum into excel, and then imported into quickbooks - a process that takes hundreds of hours.
Solutions
I. New Method for W9 Intake
II. Previously Uploaded W9 Documents - Parsing Solution
For all existing carrier documents, where the document type is “W9”, the application will parse the document and capture the W9 data (“W9 Data”).
W9 Data should be viewable in the Carrier Details page in the Broker App.
The data should be exportable to Quickbooks, and synced in the vendor information section (see below).
Changes to Carrier > Details in Broker App
Carrier Details > Tax Information
In the Carrier Profile page, we will need to make the following changes:
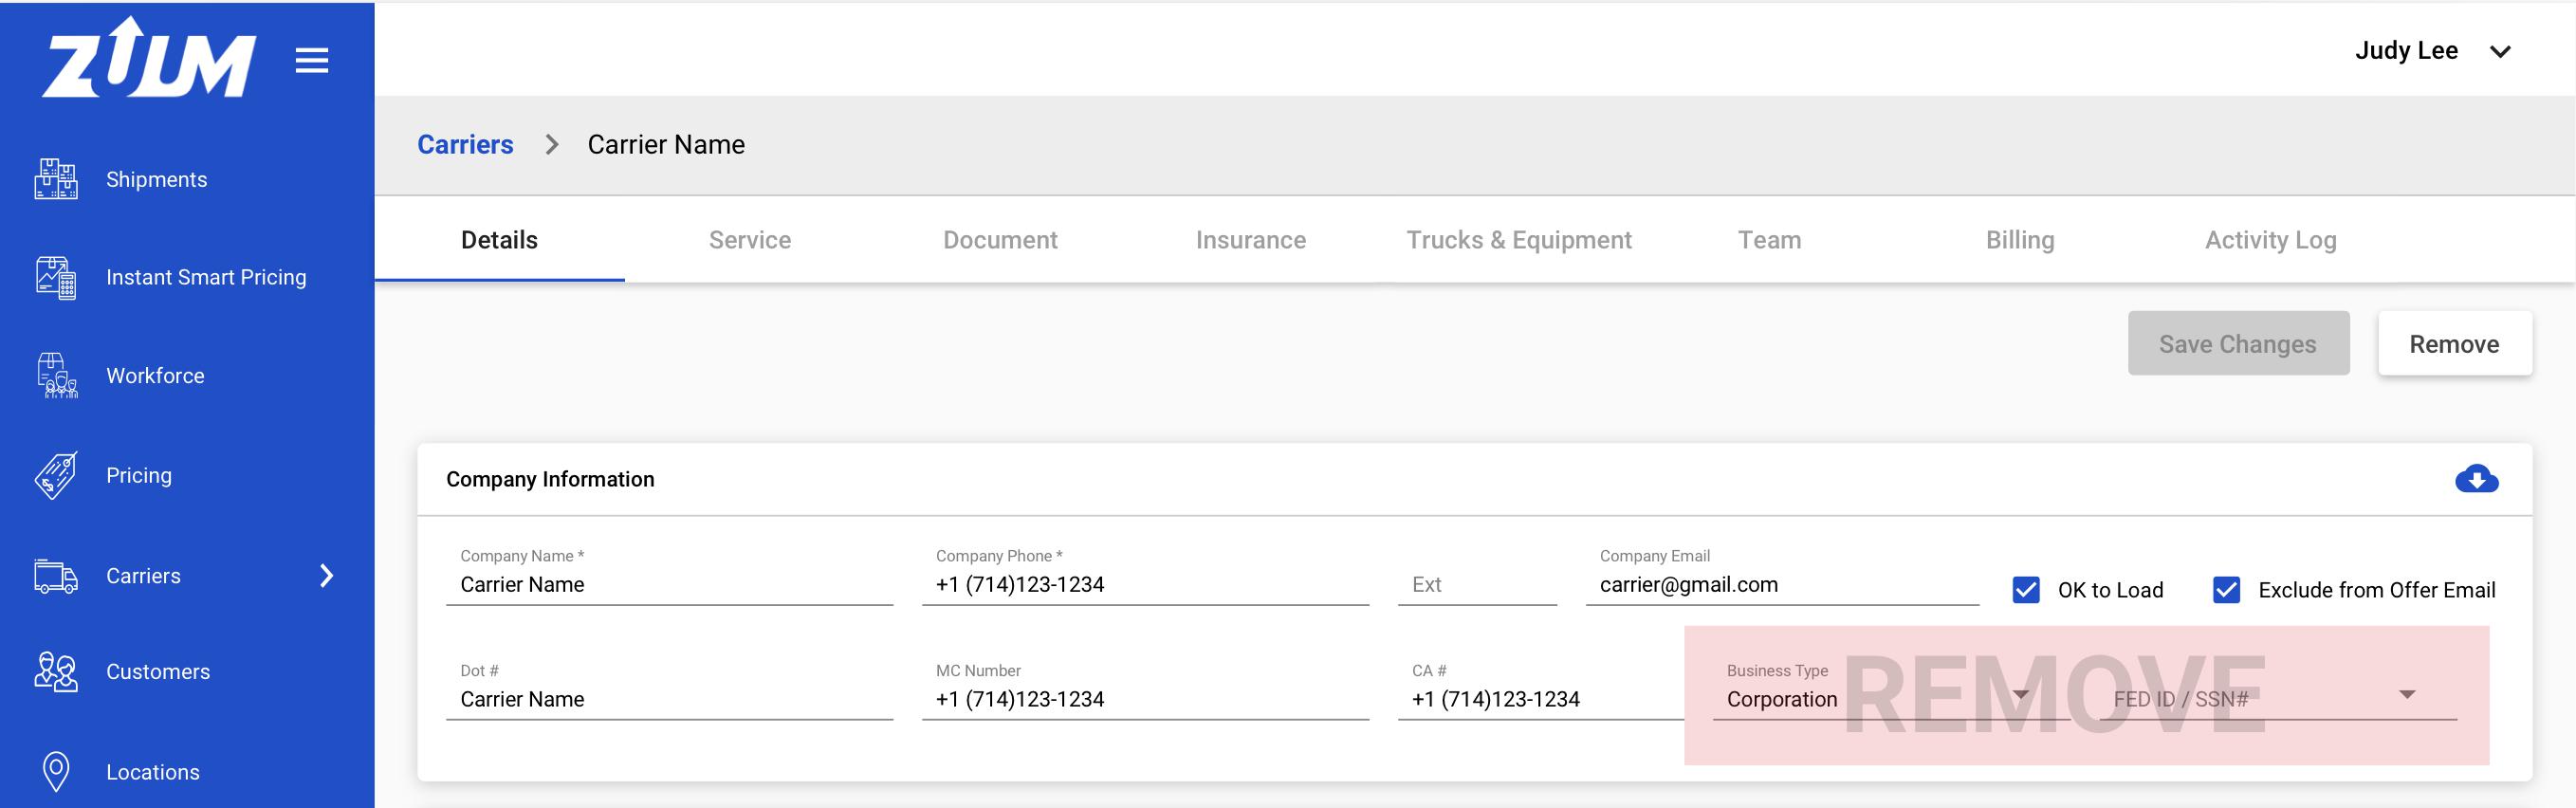
Company Information
Remove the following fields
Business type
Fed ID / SSN
New Section - Tax Information
Add a new section called tax information
Include all of the fields from the W9 Form:
1. Name
2. Business Name
3. Fed Classification
LLC Classification
4a. Exempt Payee Code
4b. Exempt FACTA Code
5. Address
6. City, State, Zip
7. Account Numbers
EIN / SSN
These fields should be Read Only

Exporting to Quickbooks
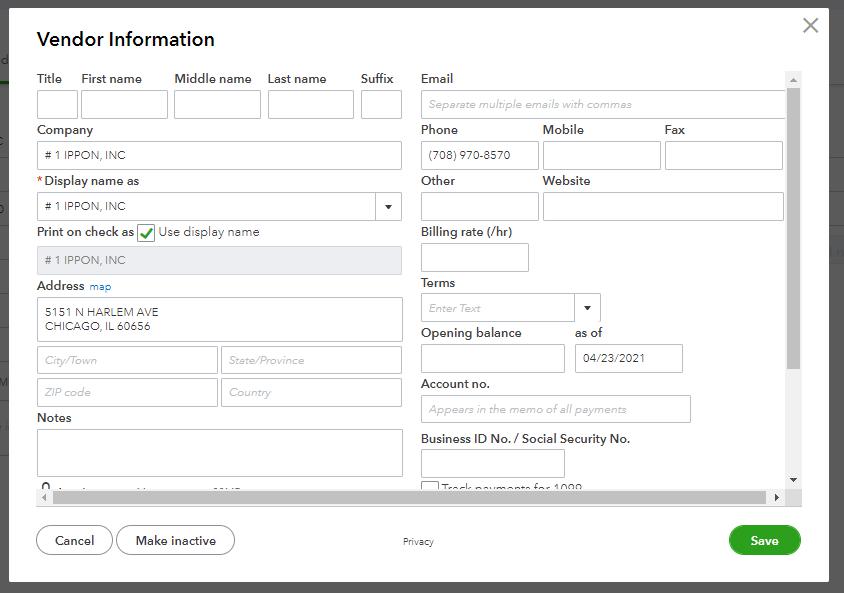
In Quickbooks online, every vendor that is created has a details page. This page has an edit button that allows the user to input “Vendor Information”
When a new carrier is onboarded, the W9 information should be exported to that Carrier’s vendor profile in Quickbooks online.
If a carrier submits a new W9, the most recent W9 should be synced with Quickbooks.
Corresponding Fields between W9 and Quickbooks online:
W9 Fields | Quickbooks Online |
| Company |
| Display Name As |
| N/A |
a) LLC Classification | N/A |
4a. Exempt Payee Code | N/A |
4b. Exempt FACTA Code | N/A |
| Address |
| |
City | |
State | |
Zip | |
| Business ID / SSN (export with dashes) |
must export with dashes |
1099 in Quickbooks
In Quickbooks, there is a checkbox called “Track Payments for 1099”. This will need to be checked based on the Tax classification that the user input in the W9 form.
Here is the logic for this checkbox:
W9 Input Data | QBO (Track Payments for 1099) |
Individual/sole proprietor | TRUE |
C Corporation | FALSE |
S Corporation | FALSE |
Partnership | TRUE |
Trust/estate | TRUE |
Limited Liability Company | |
C | FALSE |
S | FALSE |
P | TRUE |
Errors Syncing with Quickbooks
If data could not be synced to quickbooks, there should be a small icon in the “Tax Information” section of the Carrier Profile with the following text:
“Could not be synced to quickbooks. If this problem persists, please contact support.” At the end, there should be a link to “Try again”
When the user clicks this link, it should try syncing the data to quickbooks again.

I. New Method For W9 Intake
Instead of requesting carriers to upload a W9 document, we will have a digital form for the carriers to complete. This way we will have the data in our database already, and will be able to export it to quickbooks easily.
Requirements
1. Change Document Upload to Live Form
Currently the application directs the user to upload a W9 document during:
Carrier Web > Carrier Onboarding (Broker TMS / SaaS)
Carrier Web > Carrier Onboarding (shipper TMS)
Carrier Web > Settings > Documents
Broker TMS > Carrier profile > Documents
Shipper TMS > Carrier Profile > Documents
Carrier TMS > Marketplace > Onboarding
Carrier TMS > Global Settings > Documents
Example (Carrier Onboarding):
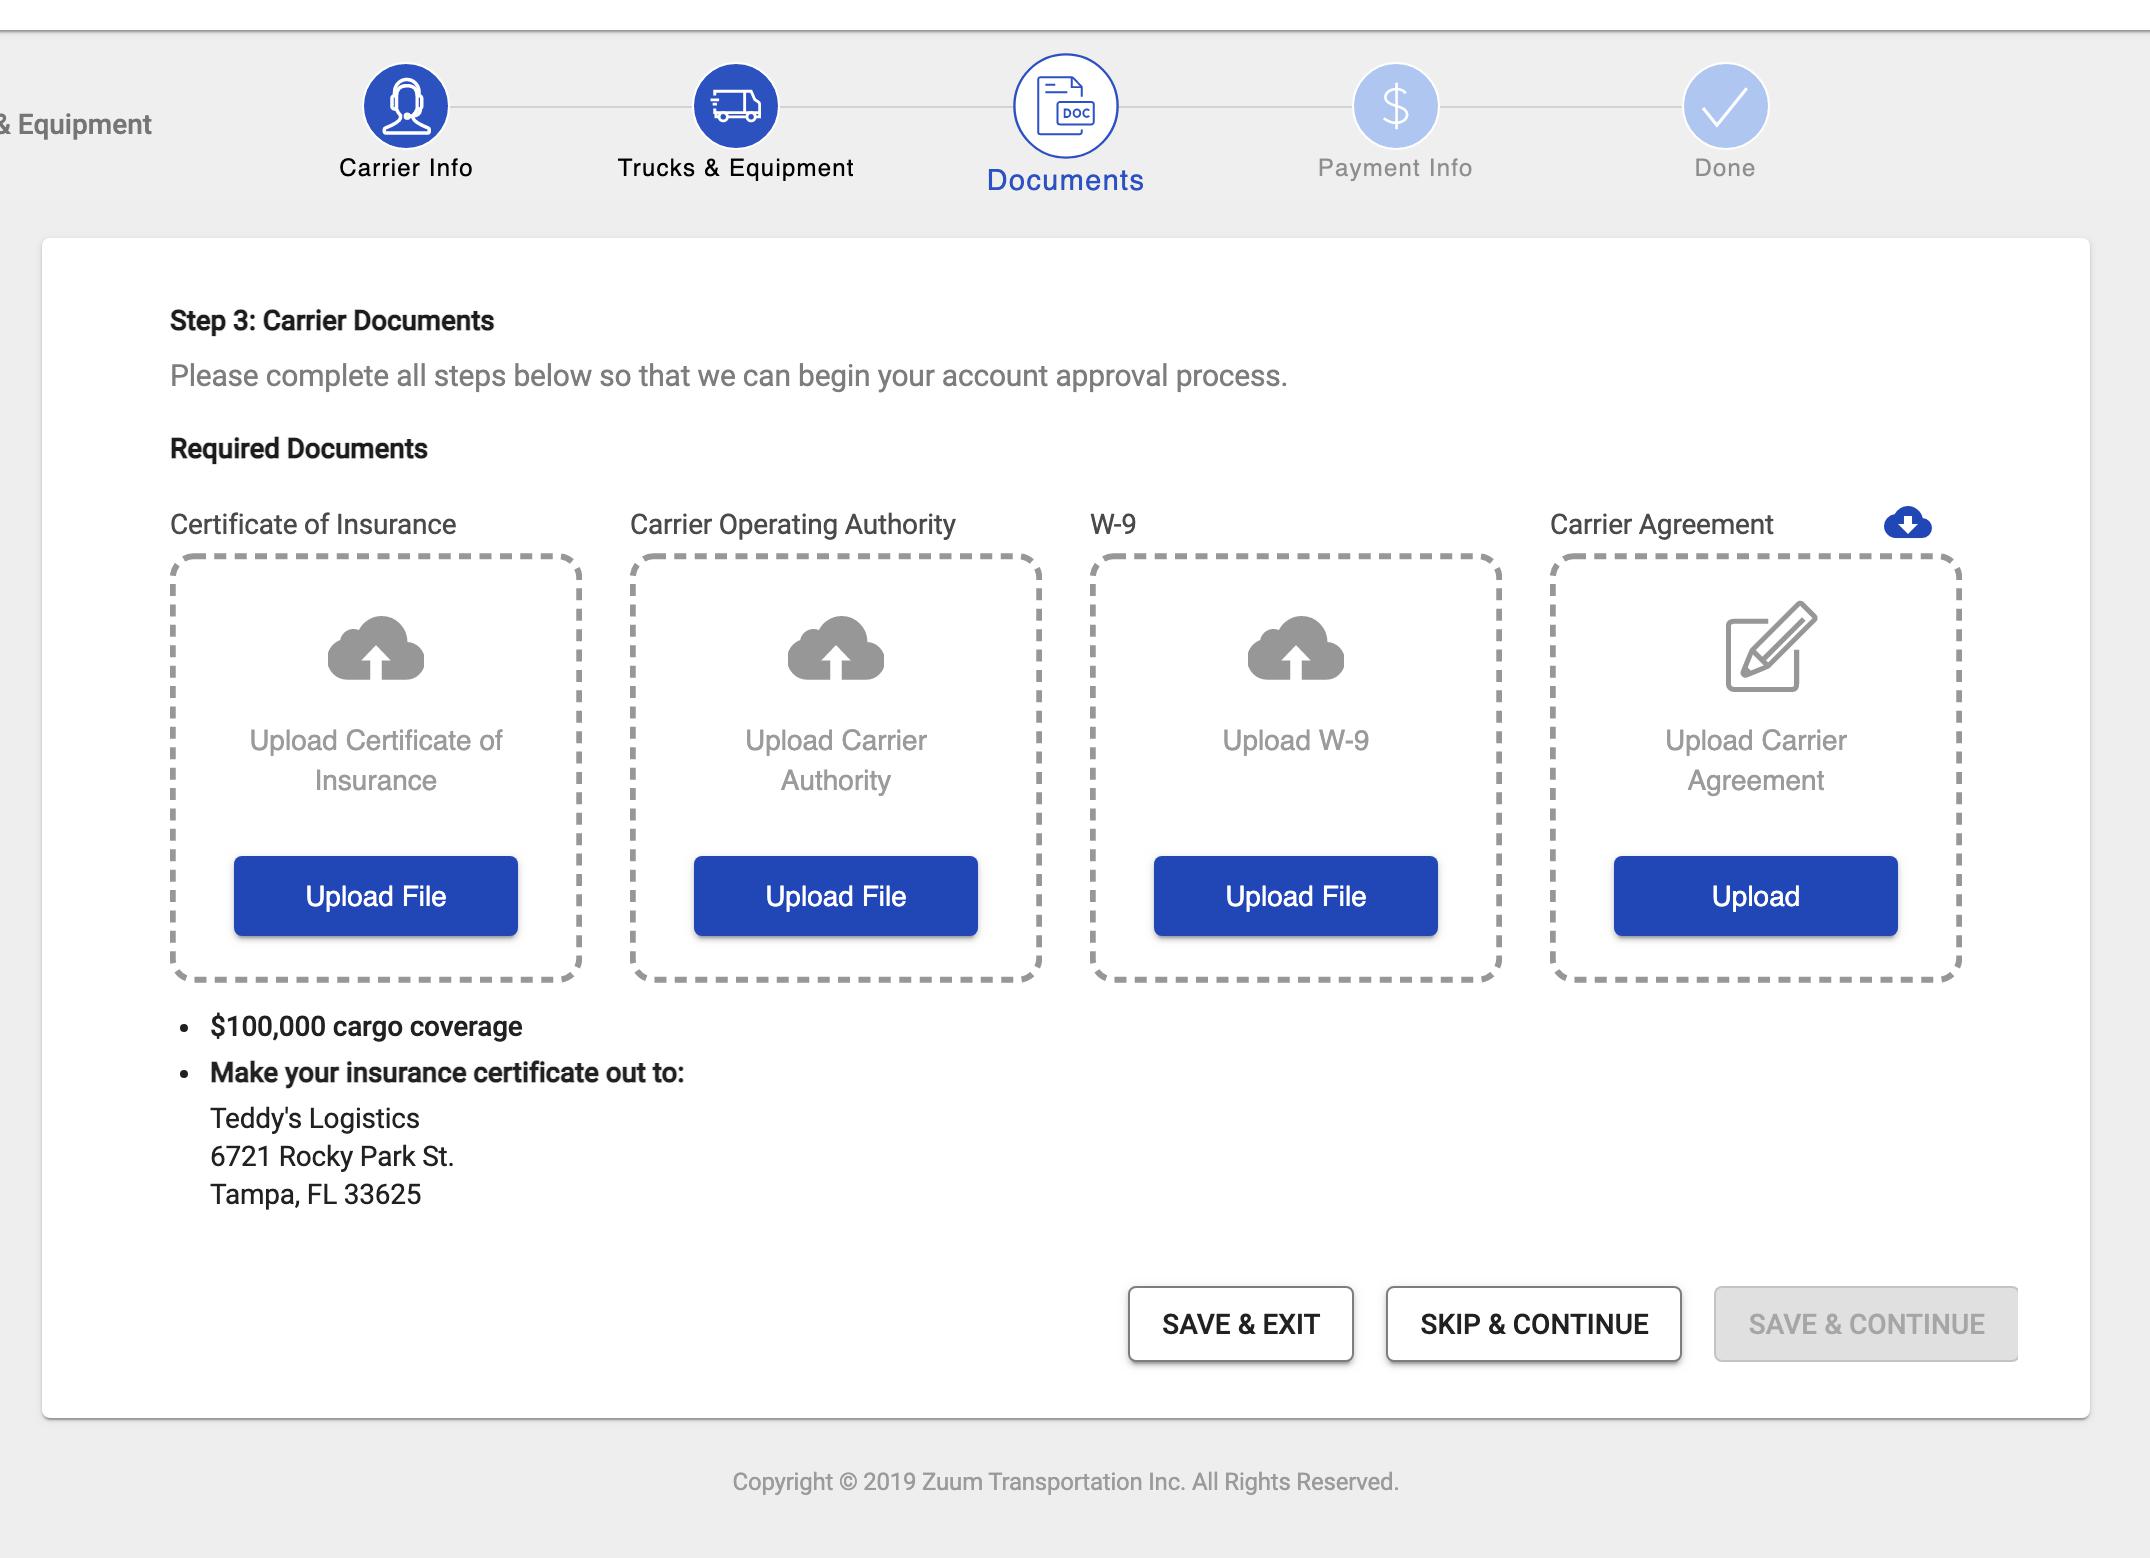
In each of the above instances,
the text in the “Upload W9” button should be replaced with “Complete W9”;
Instead of popping up the upload document modal, the button should pop up a live form that collects all of the information that would go into a W-9 form.
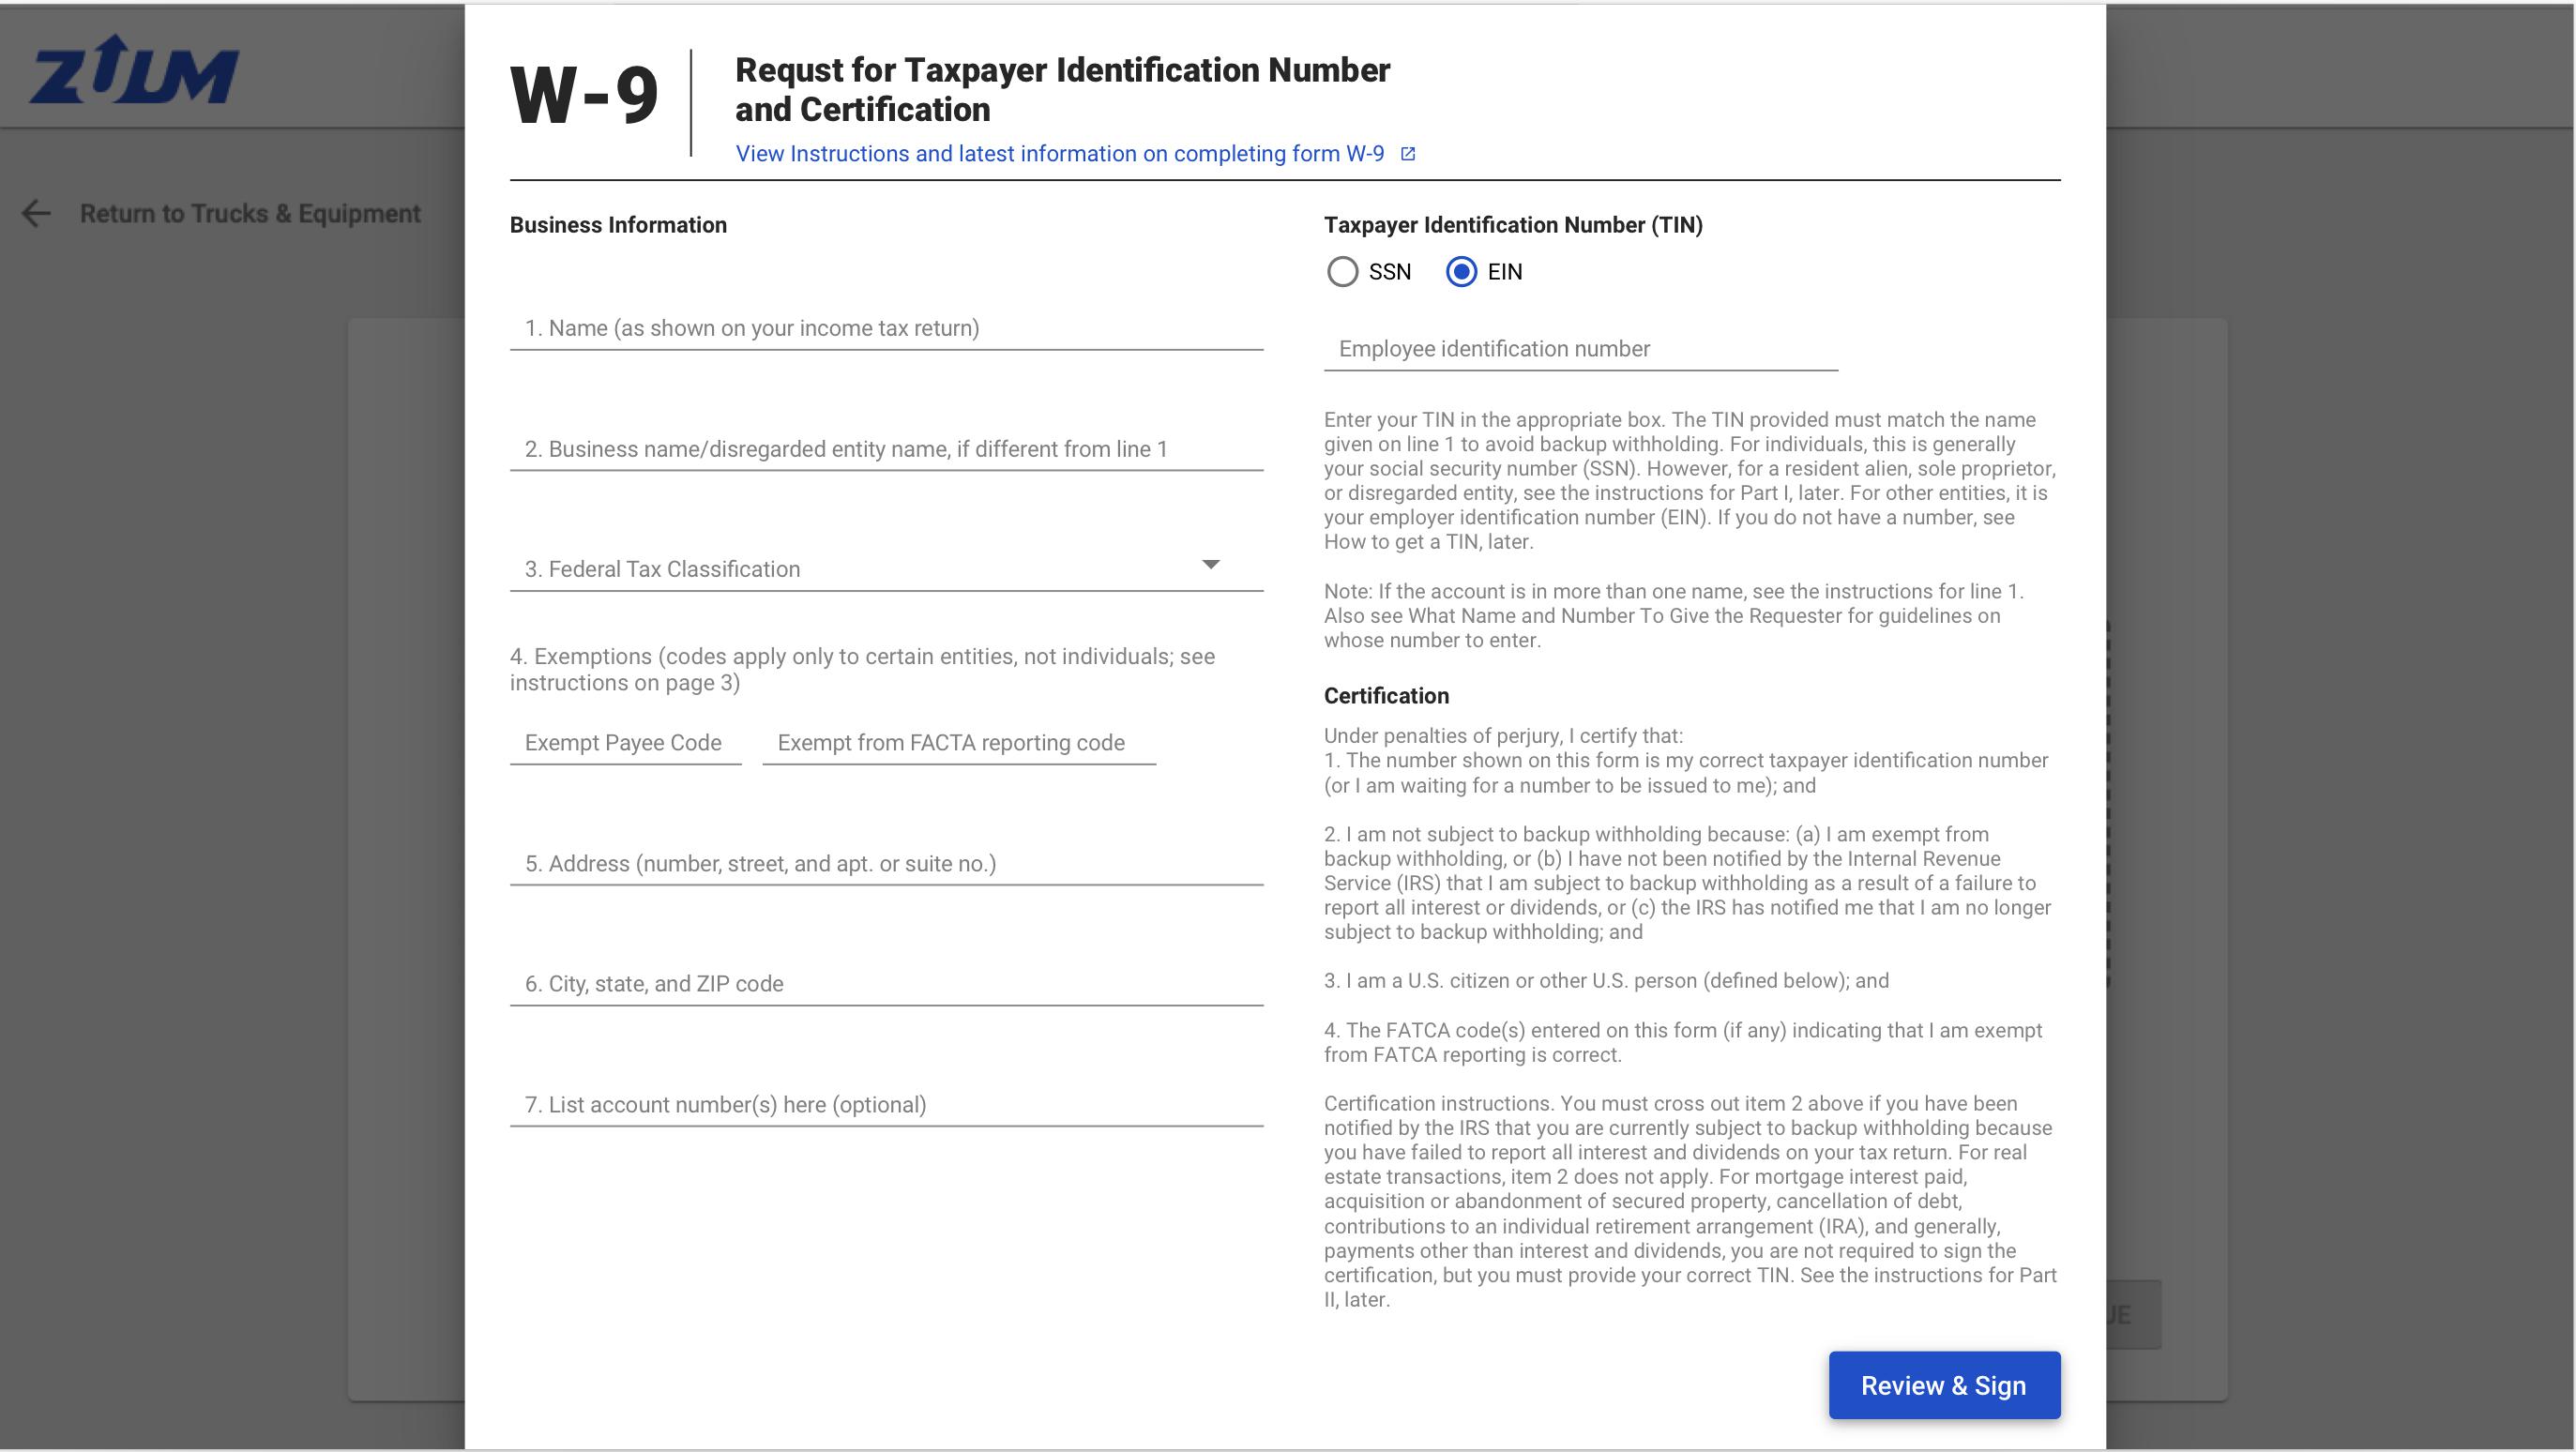
2. The Live W-9 Form
Links for reference:
Form W-9 - IRS: https://www.irs.gov/pub/irs-pdf/fw9.pdf
Instructions for Form W-9 - IRS: https://www.irs.gov/instructions/iw9
Requirements
The W-9 Form collects data and stores it digitally. This data will need to be exported to Quickbooks via the Quickbooks integration, and should be stored in such a way as to sync to Quickbooks as seamlessly as possible.
Per the IRS’s W-9 Form, our Live W-9 form must have the following fields:
All fields are required, unless marked “(optional)”
Name (as shown on your income tax return). Name is required on this line; do not leave this line blank.
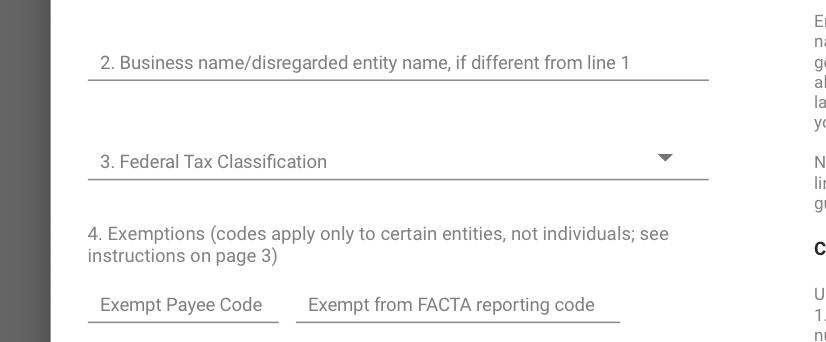
Business name/disregarded entity name, if different from above (optional)
Federal Tax Classification (dropdown, list of choices):
Individual/sole proprietor of single-member LLC
C Corporation
S Corporation
Partnership
Trust/estate
Limited Liability Company
C = C Corporation
S = S Corporation
P = Partnership
Other (see instructions)
Exemptions
This should be a checkbox, unchecked by default, with the text “Do you maintain accounts outside the US”
The below fields should be hidden when the checkbox is unchecked
When the checkbox is Checked, display the following fields (per design)
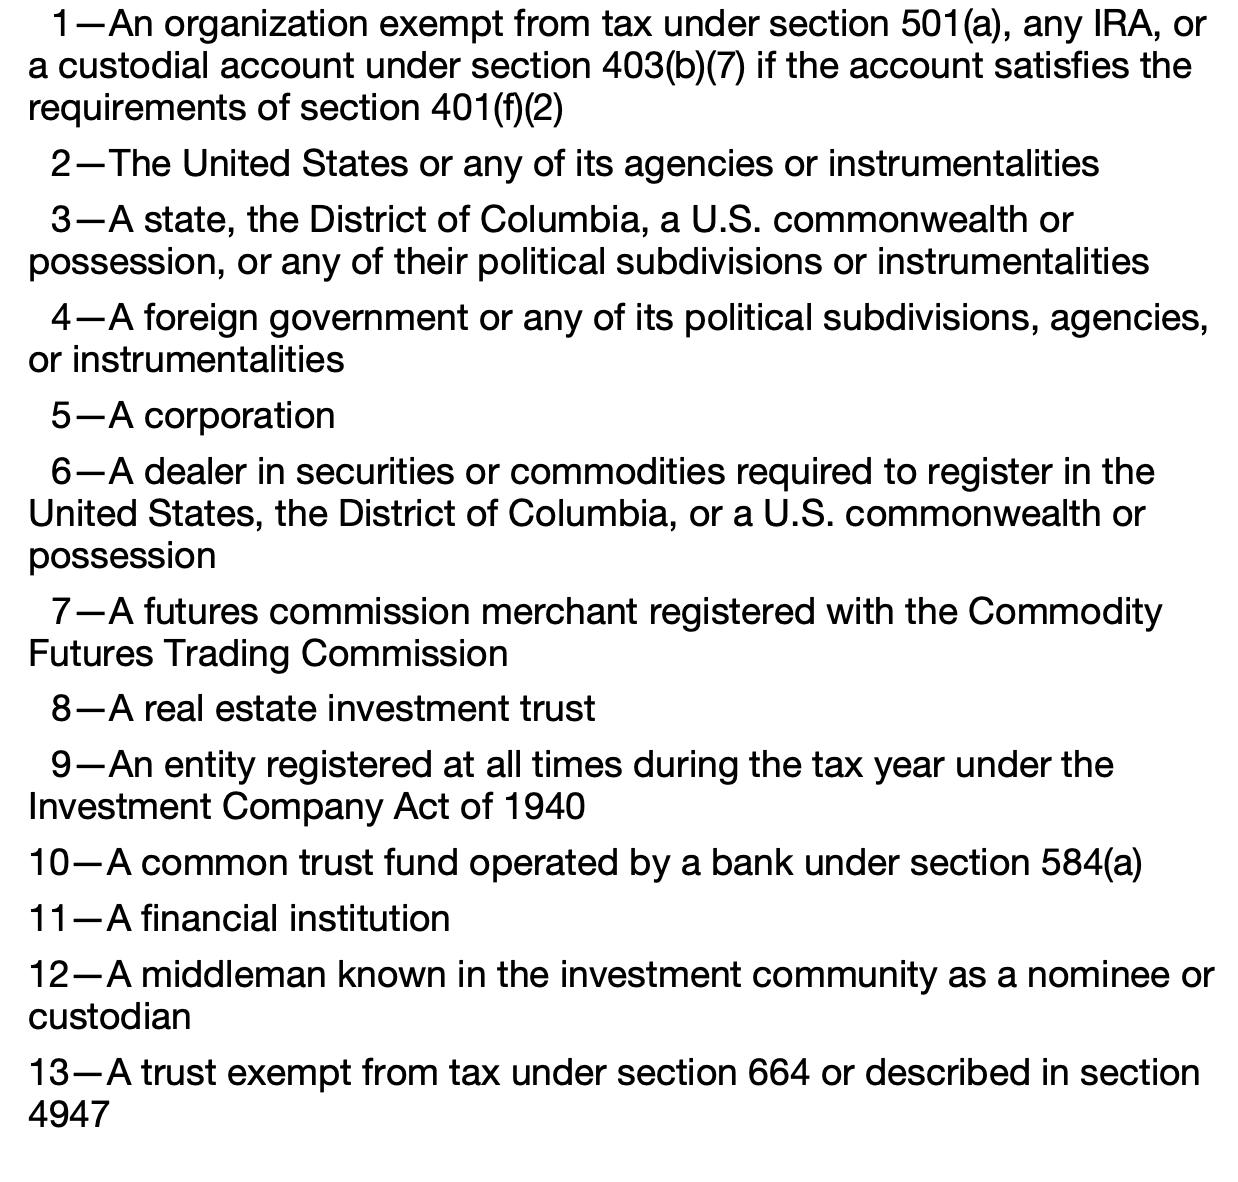
Exempt payee code (if any) (optional)
This should be a dropdown where the user can select a number from 1 - 13
There should be tooltip next to this field with definitions for each number
The definitions are as follows (this text can be found on the W-9 form, page 3 under the heading “Line 4, Exemptions”
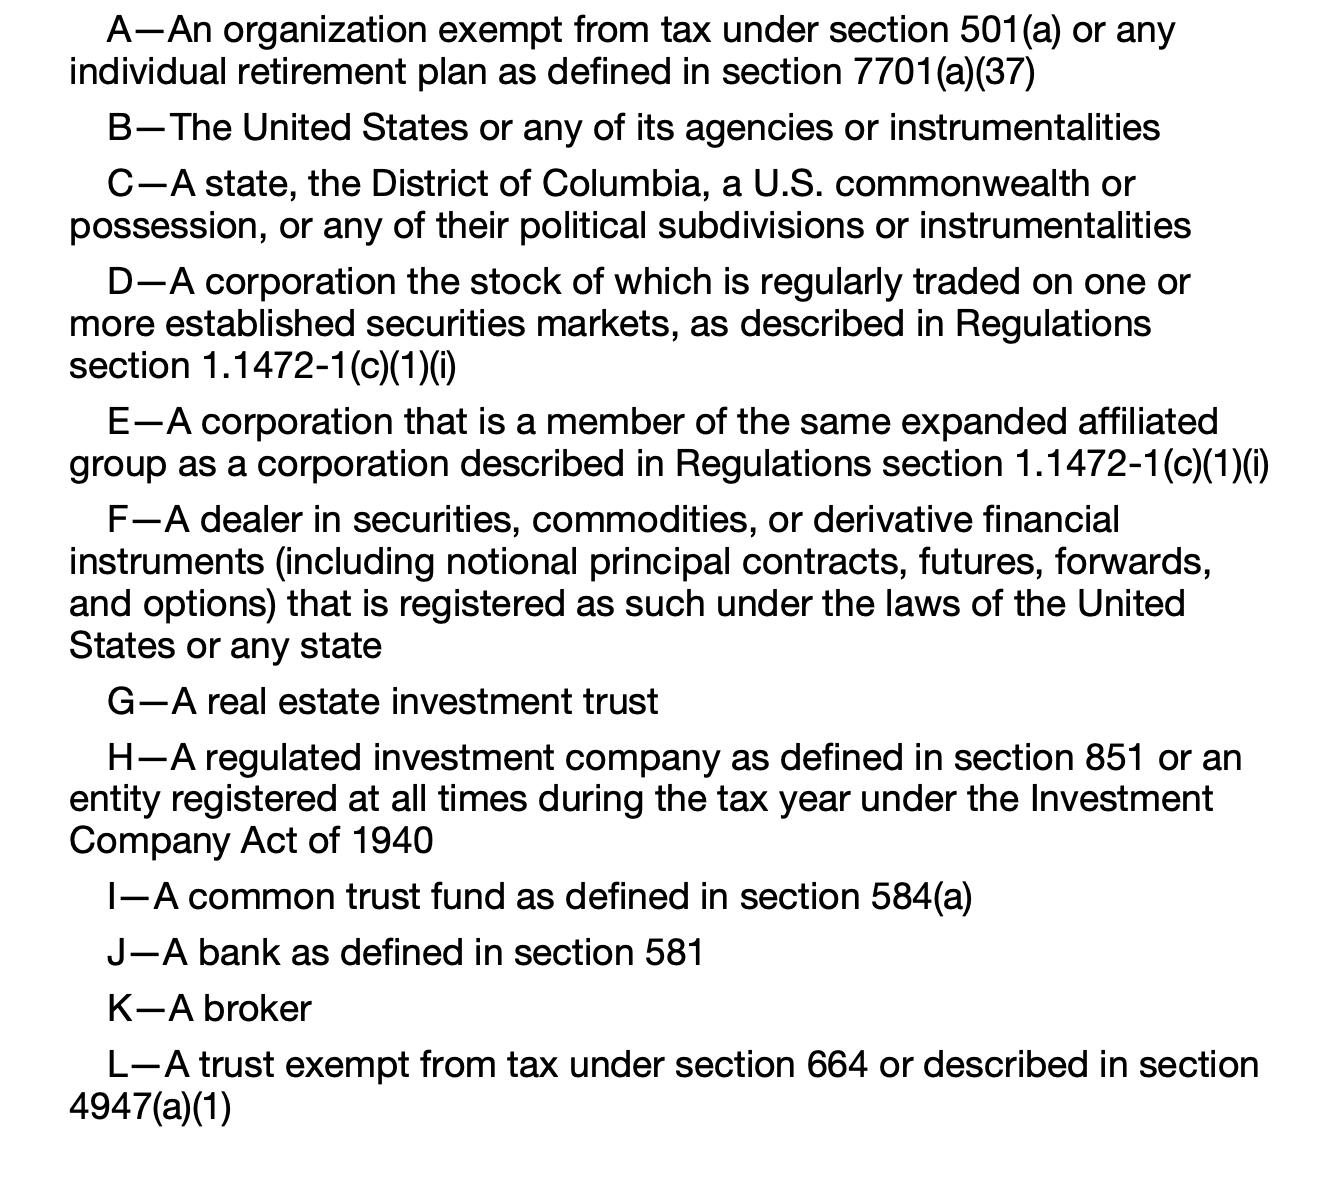
Exemption from FATCA reporting code (if any) (optional)
This should be a dropdown where the user can select a letter from A - M
There should be tooltip next to this field with definitions for each letter
The definitions are as follows (this text can be found on the W-9 form, page 4 under the heading “Exemptions from FACTA reporting code.”

Validation
The user must complete one or both of these fields; or
The user can uncheck the box and proceed
Address (number, street, and apt. or suite no.) See instructions
City, State, and Zip Code (use google maps API for city, state, zip)
List account number(s) here (optional) (optional)
Requester’s name and address (optional) (optional)
Taxpayer Identification Number (TIN) (radio button)
SSN; or
EIN
Form Logic for Certain Fields
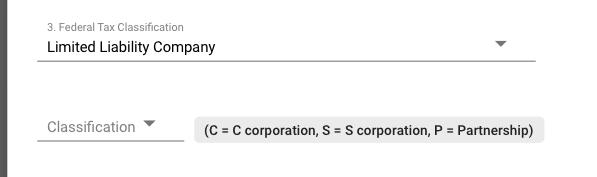
Federal Tax Classification - LLC
In the form, Item 3 - “Federal Tax Classification” should only have 1 line by default
IF the user selects “Limited Liability Company” from the dropdown, then the following should appear:
A dropdown field with the label “Classification”, and the following options:
C
S
P
A visual element with text that helps the user understand what each letter means
Taxpayer Identification Number
The taxpayer identification number section has a single field where the user can input either a
Social Security Number; or
Employer Identification Number
This field should only allow the user to input numbers.
Whether Social Security Number is displayed or Employer Identification Number, depends on the which radio button the user selects.
The user’s input should be formatted as follows:
For Social Security Number
Formatting:
###-##-#### (9 characters)
For Employer Identification Number
Formatting:
##-#######
Done via Zuum Sign
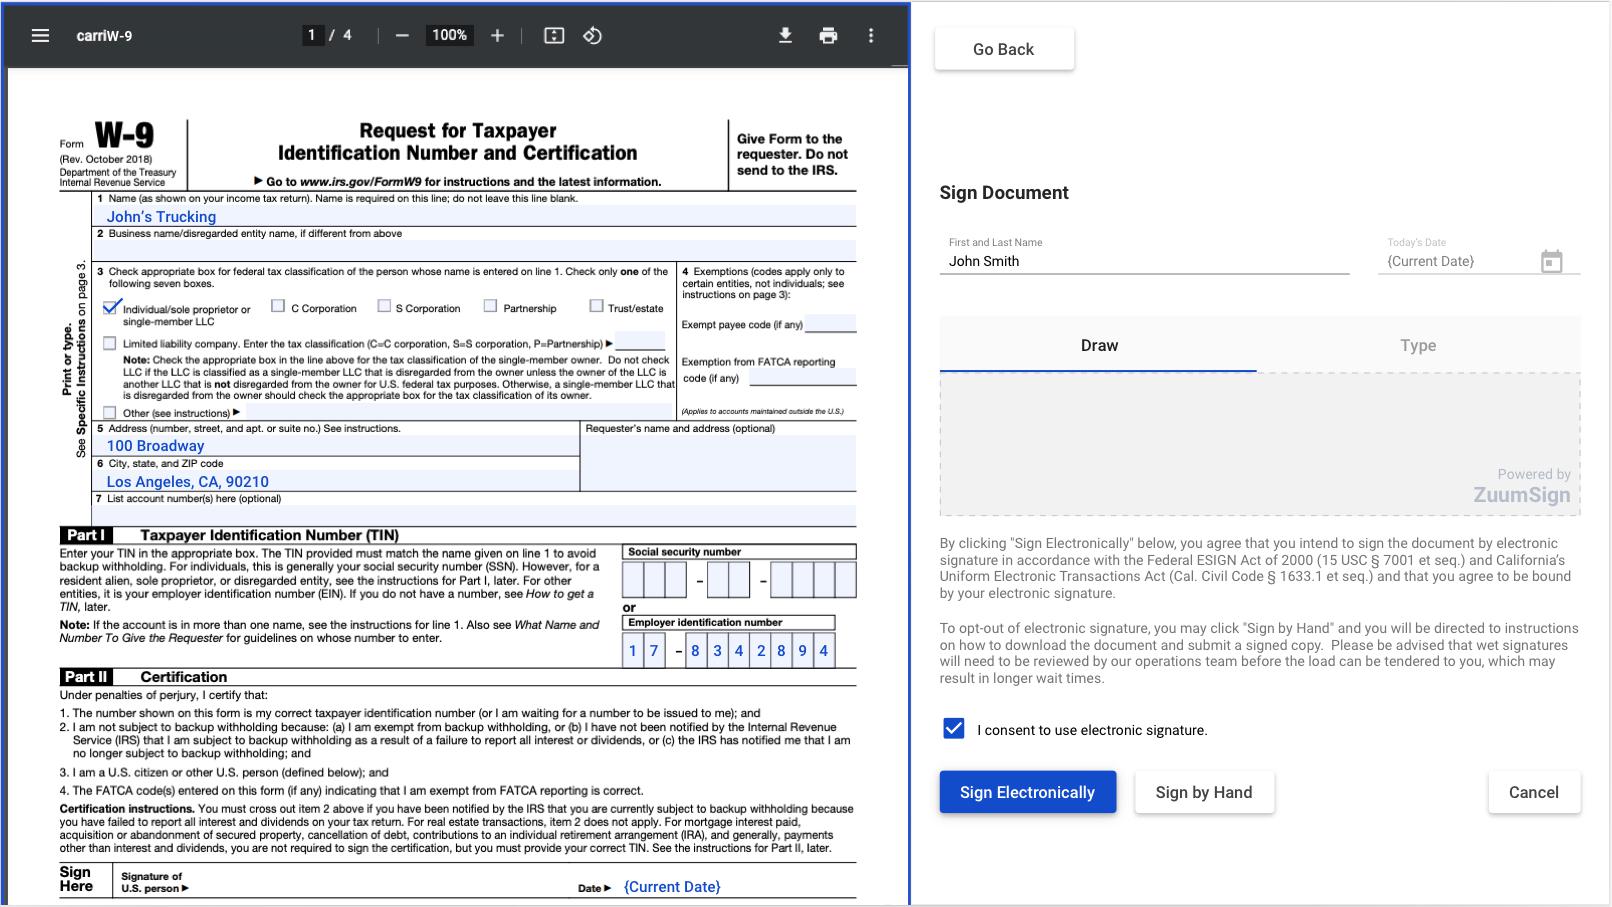
Once the user has completed the form, the user can click the “Review & Sign” button.
This button takes the user to a split screen where:
On one side the user can see a preview of a W-9 form that is completed with the data that the user input in the live form; and
On the other side, a Zuum Sign form where the user can digitally sign the W-9
Completed W-9 Form
On the preview of the completed W-9 form, the current date should be pre-filled in the date field.
After Digital Signature is Complete
After the user digitally signs the W-9 form, the user’s signature should appear on the signature line of the form.
The user’s name and title do not appear on the W-9 Form, but should appear on the certificate of digital signature that is generated after the form is signed.
The document should be stored in that Carrier’s documents tab as the W9 Document
The Data should be stored in the Carrier’s profile under a new section called Tax Information
Sign By Hand
If the user elects to sign by hand, the Sign By Hand flow should include the W9 PDF in the document link.
Carrier Documents
In the documents tab, the W9 Document should include all of the same options, so that the user can manually upload a W9 if necessary.
If a W9 is uploaded by the user or the carrier
The Tax Information section in the Carrier Details page should allow the user to input the Carrier’s data.
New Action
In the “Actions” column, there should be a new action called “Request W9”
When the user clicks this, the user is able to enter an email address
This sends an email with a unique link that takes the recipient to the live W-9 form flow described above.
When completed, this will submit the W-9 form and information for the carrier whose profile was used to trigger the action.
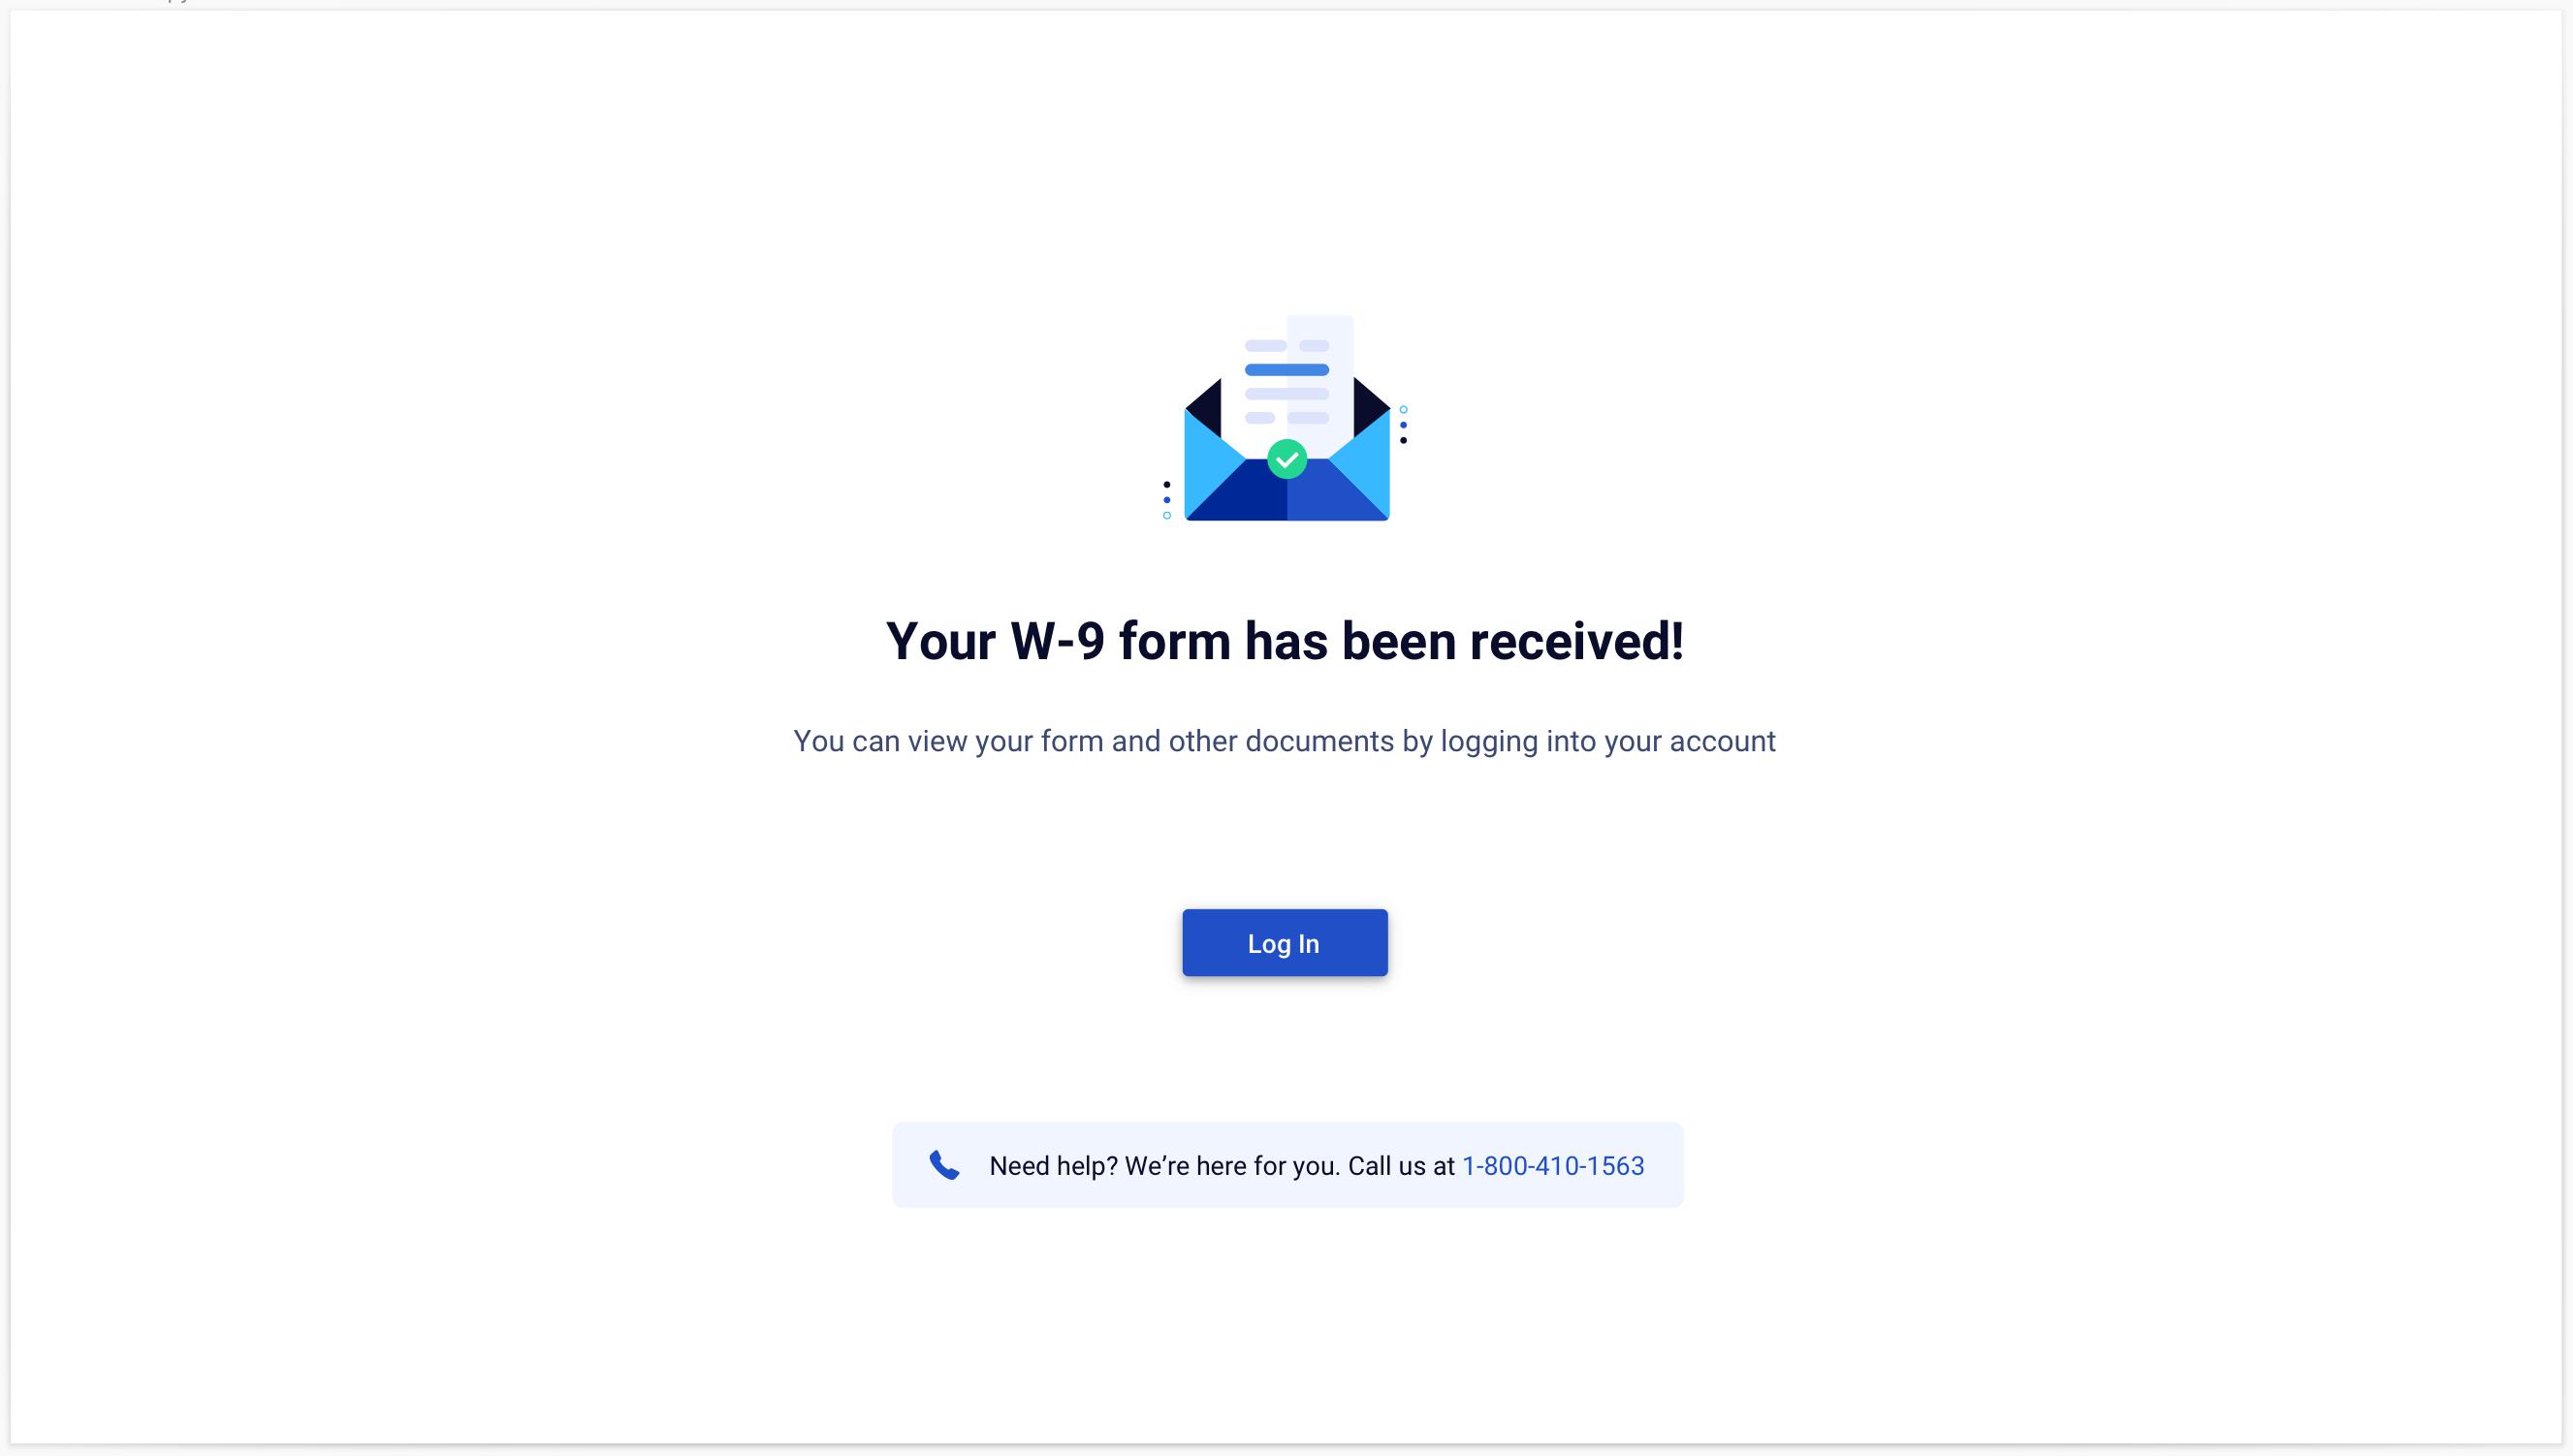
When the user submits the W-9 from this flow, there should be a page that tells the user that their W9 was submitted, with a link to log in to their account
II. Previously Uploaded W9 Documents - Parsing Solution
W9 parsing will be done through a 3rd party integration called DocSumo.
Currently, every carrier in Zuum’s database has a completed W9 form that has been uploaded into their database.
Once the W9 parsing integration has been implemented, the updates have been made to the Carrier Details page; and the W9 data has been properly synced to for exporting to external accounting software, we will need to capture the data from all of the existing W9 forms in the carrier database, and exported to Quickbooks.