


[Carriers] OCR DocSumo - Insurance
Document status | COMPLETE |
|---|---|
Last Updated |
|
Document owner | |
Designer | |
Developers |
|
Design | https://www.figma.com/file/37bDDxRvgKpfthFpRQFTI1/Carrier-Insurance-DocSumo?node-id=0%3A1 |
Related Documents | |
Version | V1: |
Overview
We want a way to upload an insurance document and have DocSumo assist the users to fill in the tex fields with the information provided in the document. This will help the operators save time as well as prevent errors.
We currently have this functionality where it automatically imports the information from the document to the insurance cards. But, we want a way to preview the information being imported first, to confirm everything is correct, as well as fix any errors that may have come up.
We will be having a Preview modal where the user can see the document side-by-side to the insurance card form. They can preview the information that will be imported before submitting to confirm everything is correct.
We will be using this only for insurance documents (Accord 25) for now. There will be other documents in the near future.
Upload Insurance Certificate
1.1 Doc Preview
Design: Figma
Once a broker uploads an
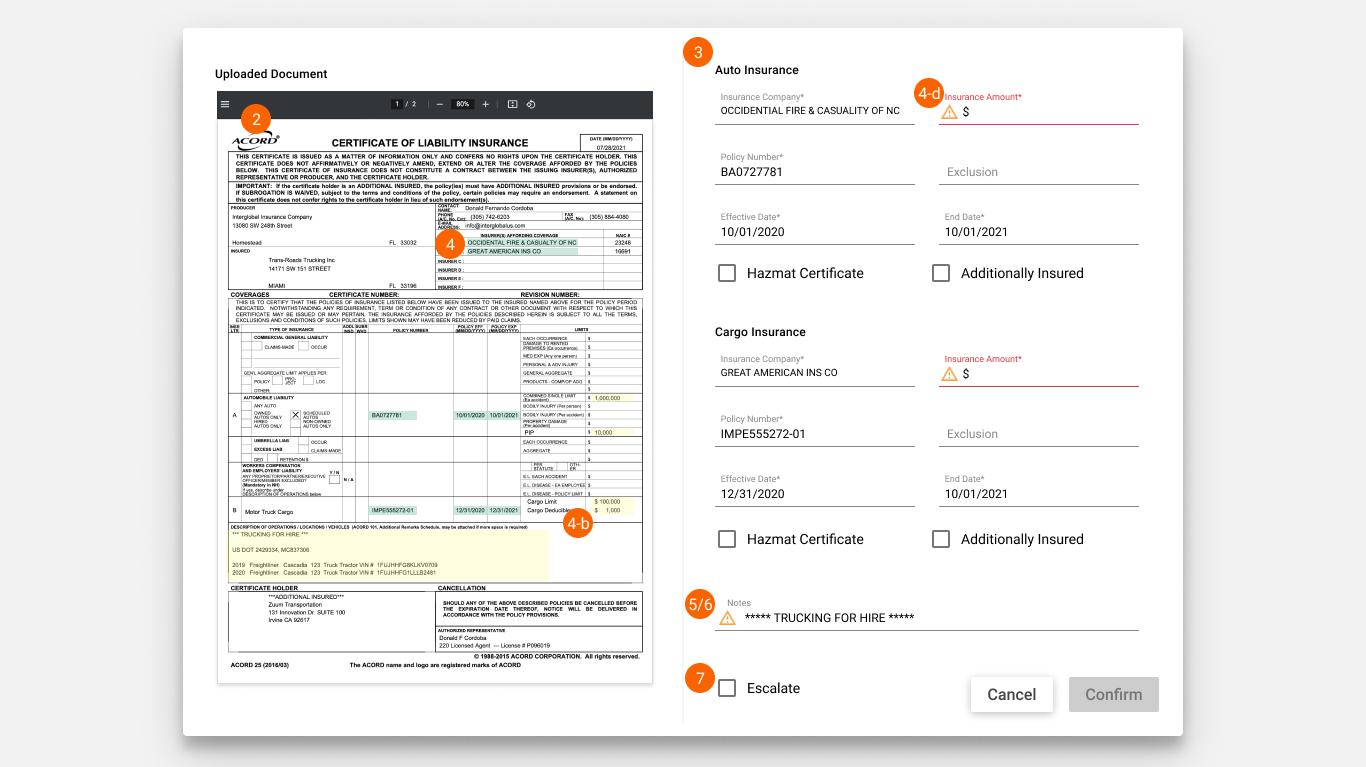
Insurance Certificatein theDocs & Imagestab or in theInsurancetab, we will be using DocSumo to auto-fill in the required fields. Once the user clicks theUploadbutton from the upload modal, display this modal that will act as a preview to confirm the information importing is correct.On the left side, display the PDF or IMG file that the user uploaded. We can use the current doc preview so the user can zoom in/out.
On the right side, display the 2 required cards
Auto InsuranceandCargo Insurancetext fields. It is the exact same fields on the current insurance cards. This is where the user can see the information imported from the document on this side of the modal, as well as edit the text fields.DocSumo will be reading and generating a JSON for certain required fields and will be auto-filling to the text fields on the right.
the required fields:
Insurance Company
Insurance Price
Policy Number
Start Date
End Date
If DocSumo was able to successfully import the data we can highlight the area and the text on the doc, in green
If DocSumo was not able to import the data, or was able to bring some parts of it, highlight the area and text in yellow.
For example, in the design, the document as the Insurance A line say
OCCENTIAL FIRE & CASUALTY INC. On the form (right-side) we see thatCompany Namehas been successfully filled withOCCENTIAL FIRE & CASUALTY INC.The price for A is highlighted in yellow, because there are two prices listed. The system might not know what to do with these two prices. In the
Auto Insurance>Insurance Pricetext field has the warning icon and highlighted in red, because this is a required field.If the field is not required, we do not need to highlight the text field.
If DocSumo was able to successfully import data into the text field form, please auto-fill the text in the form. If any errors happened, or something that the system is not sure, please display the warning icon in the text field, so the user can put their attention to it.
We will add an additional field which is for notes. We will also fill in the notes text field from the
Description of Operationscontainer in the documentWe will also add an
Escalatecheckbox. Refer to screen 1.3
1.2 Doc Preview - filled
Design: Figma
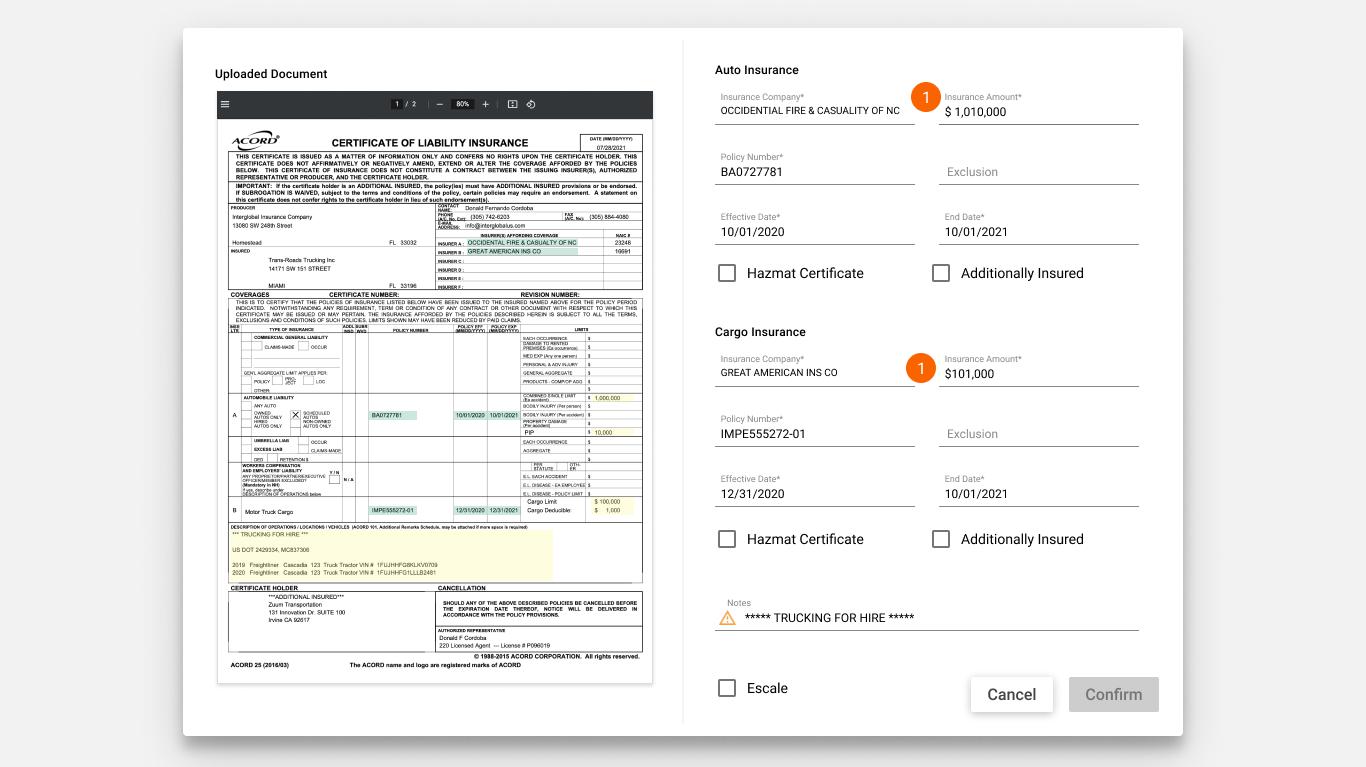
This is an example of what the form (right side) would look like, if the user were to update the warning required text fields.
because the user completed the form, it is no longer red and the warning icon is gone
If all fields have no errors or warning icon, the
Confirmbutton will be active
1.3 Escalate checked
Design: Figma

For a non-required text field, the user can still continue to upload the document, even with the warning icon. This can happen by clicking on the
Escalatecheckbox.The user is wanting to escalate uploading the form, and may come back to fix it later. Only when the
Escalatecheckbox is selected, have theConfirmbutton become primary
1.4 Docs Page
Design: Figma

If the user escalated the document, and the warning icon was next to a text field, the user still see the same warning icon next to the
Insurance Certificateitem on theDocumentstab.The status is still
Completesince the file was uploaded, but it was escalated so we will display that with the warning icon.
If the preview modal had no warning icons and the user did not need to escalate the preview, there will be no warning icon needed here.
1.5 Insurance Tab
Design: Figma
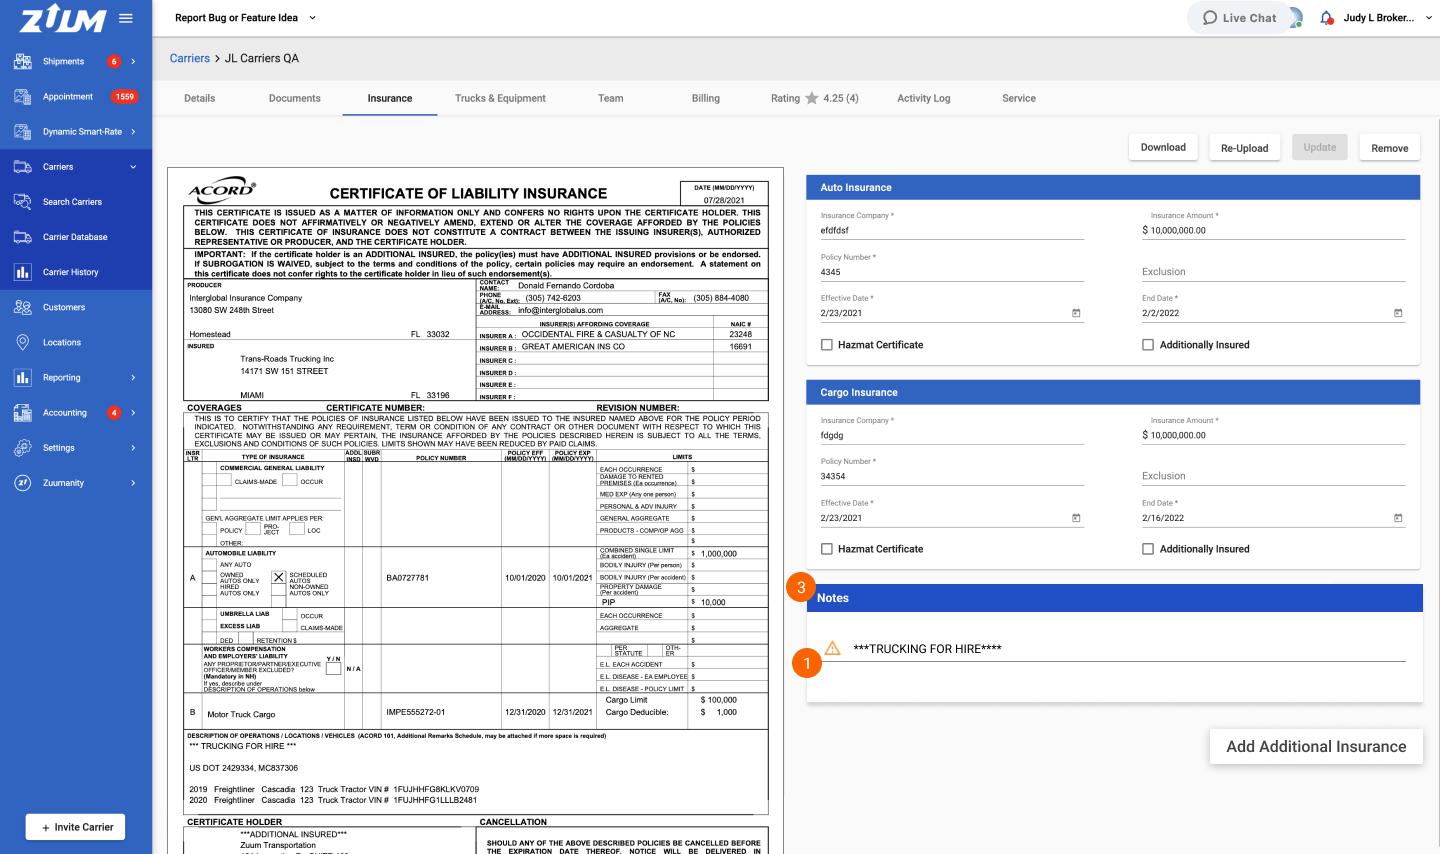
If the user escalated the document, and under the
Insurance Tabwe will see the same warning icon next to the same text field that originally had it, during the preview modal.We can see that all the transferred information that we confirmed are displayed in the
Auto InsuranceandCargo InsurancecardsWe will add a new card for
NotesDo not display the highlighted green and yellow containers on the document.
If the preview modal had no warning icons and the user did not need to escalate the preview, there will be no warning icon needed here as well.