


[Build Shipment] Adding Customer Representative
Document Status | IN PROGRESS |
|---|---|
Last updated | |
Stakeholder | EFW & Telex |
Designer | |
Developer |
|
Ticket |
|
Build Shipment - Design | |
Customer Tab - Design |
Purpose
When we add a customer to a load, the “owner” of the customer receives all the tracking emails for all their active loads. This overwhelms the owner of the customer so we want to be able to assign the customer representative to a load so this person gets the emails instead.
In order to make this happen, there are three places that need an update:
Build Shipment > Customer Field
Add Customer Representative field
Shipment > Customer Tab
Display rep(s) who’ve been assigned to a load
Shipment > Tracking
Enable Tracking Email
Log Check Call
Use Case #1: Adding Customer Representative
.jpg?api=v2)
Prototype: here
Step #1: bookShipment_01
Action: Click on the Customer Rep Field
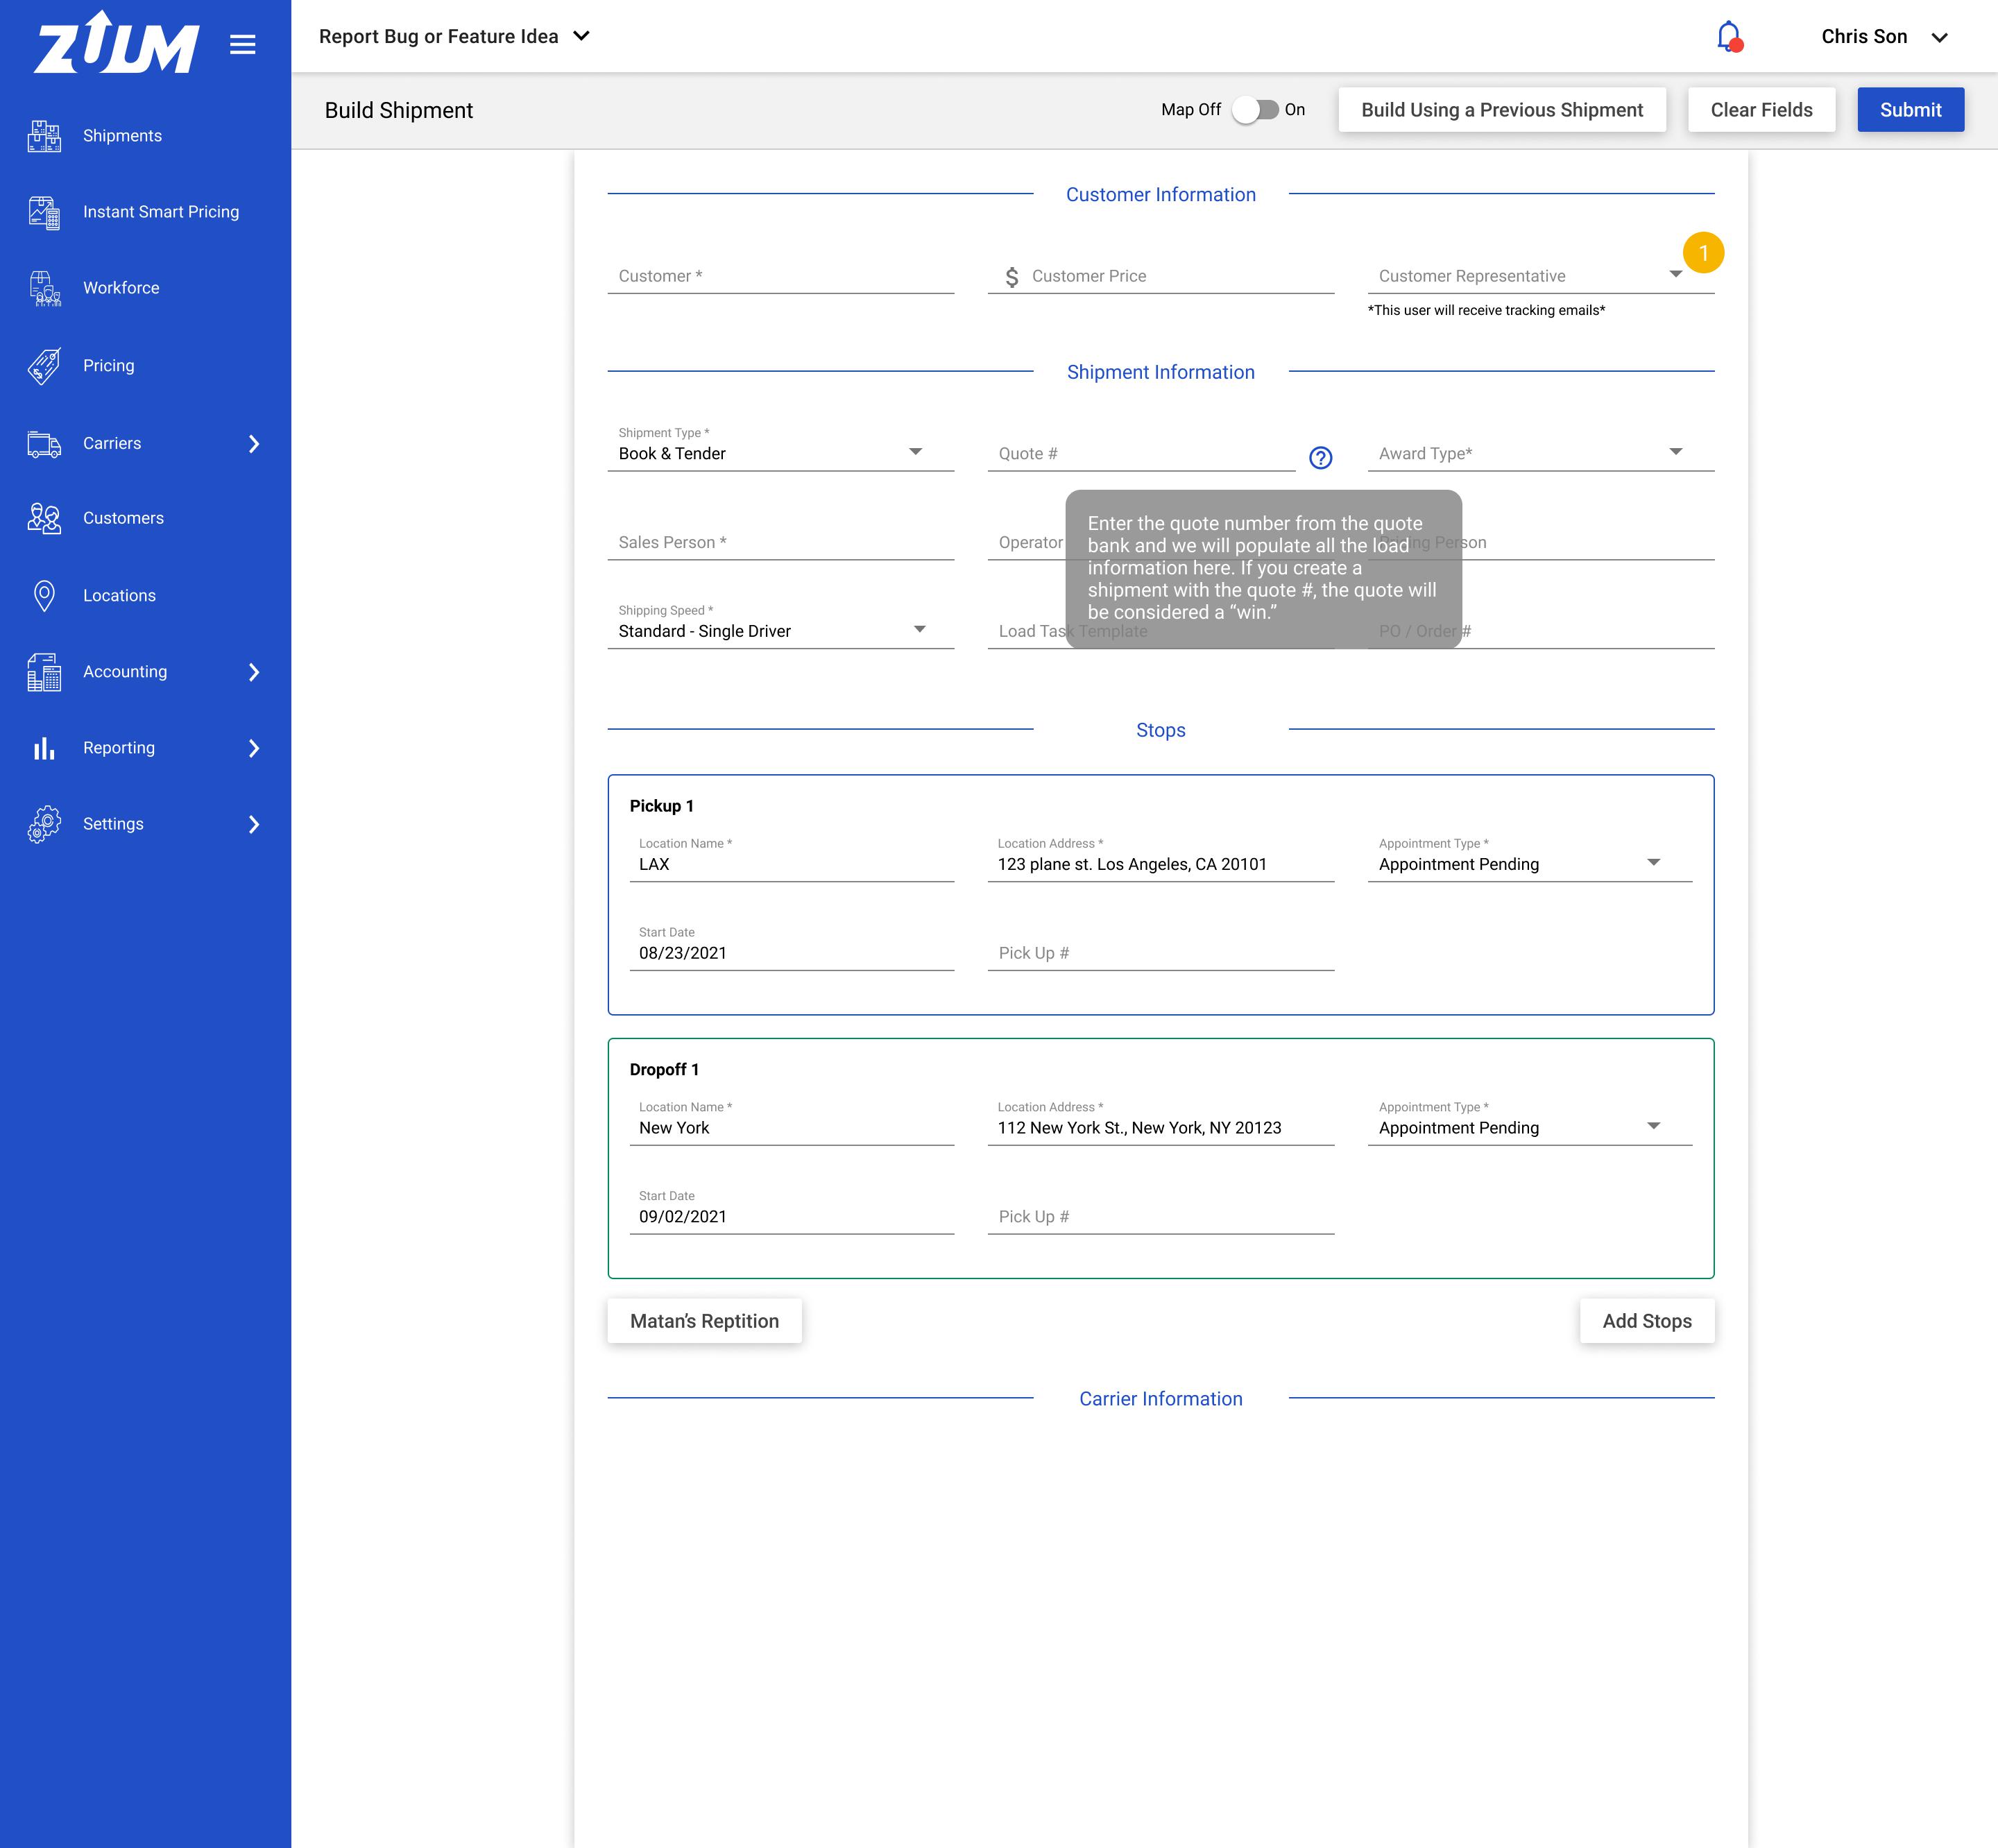
Customer Representative Field
This is where you can assign the customer representative(s) to a shipment
Whoever is assigned here will be the contact person and will receive tracking emails if enabled
Step #2: bookShipment_02
Action: Click the users you want to assign to a load
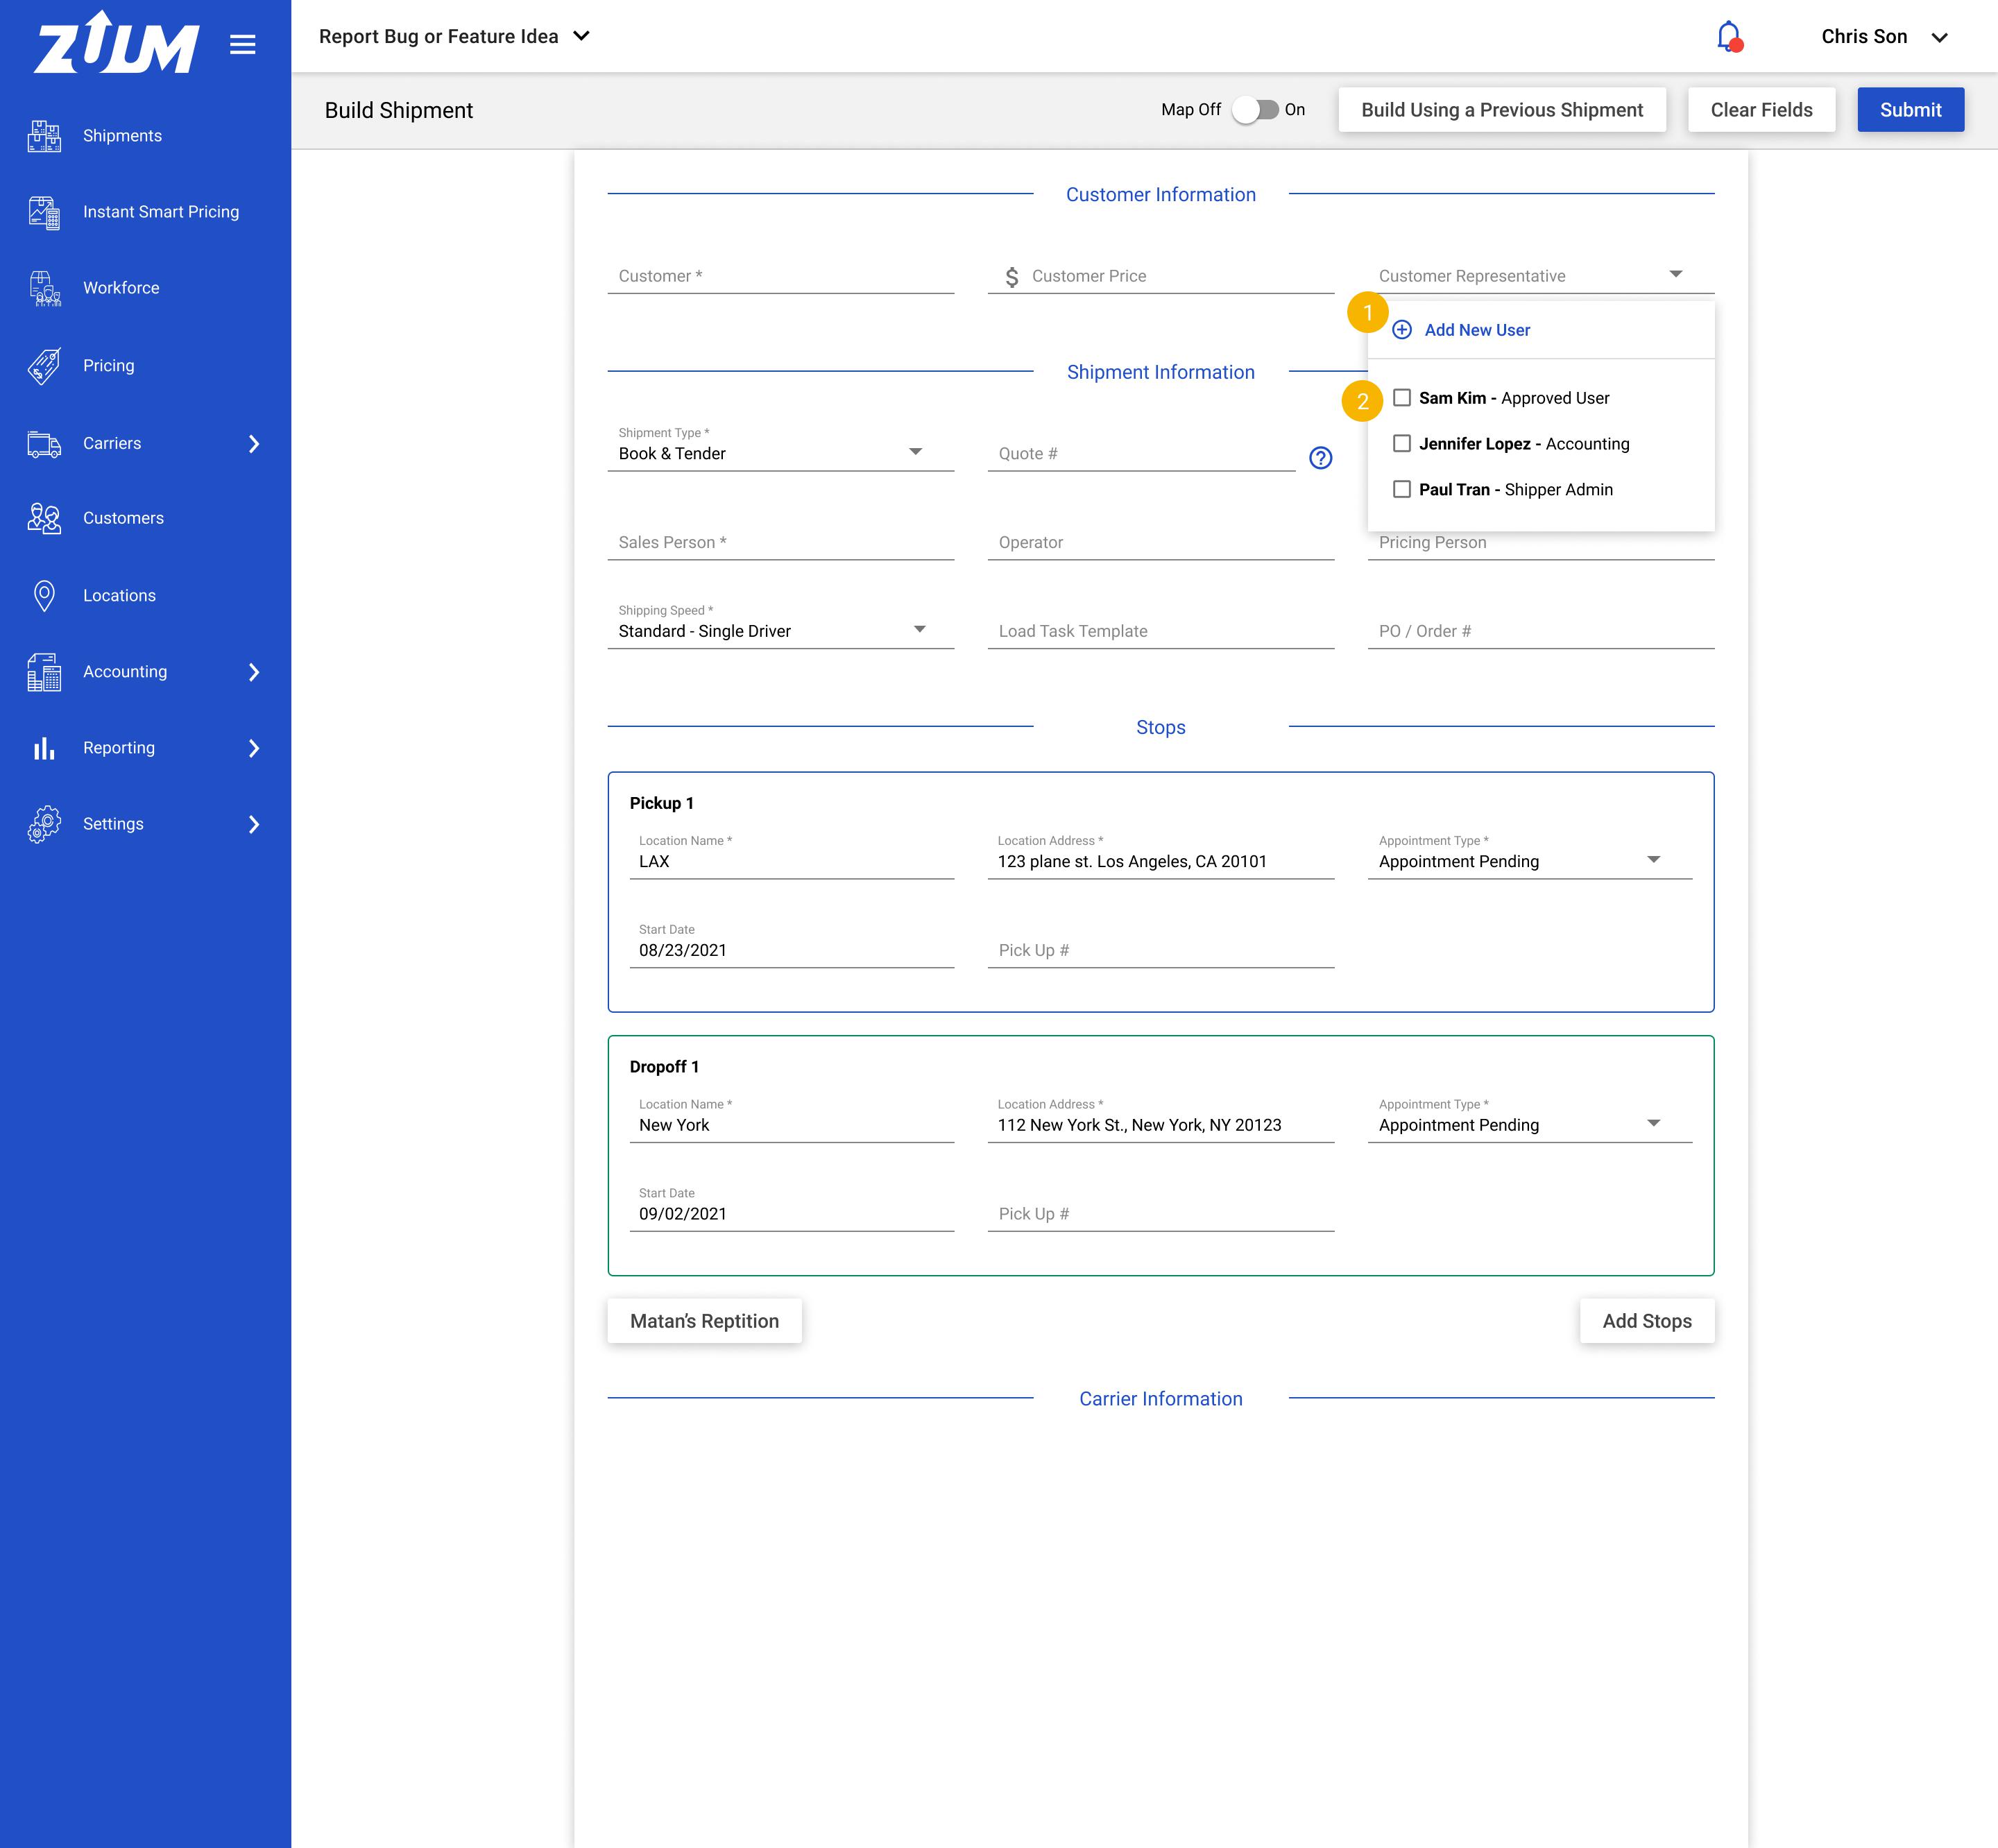
Add New User
Just like the customer, you now are able to add new users to a customer
Once created, the new user will be selected
We will discuss adding customer flow later
List of Users
Here, we display all the users associated with this customer
We can add multiple customer reps
We want to format the name as below:
User Name - Role
Step #3: bookShipment_03
Action: Exit out
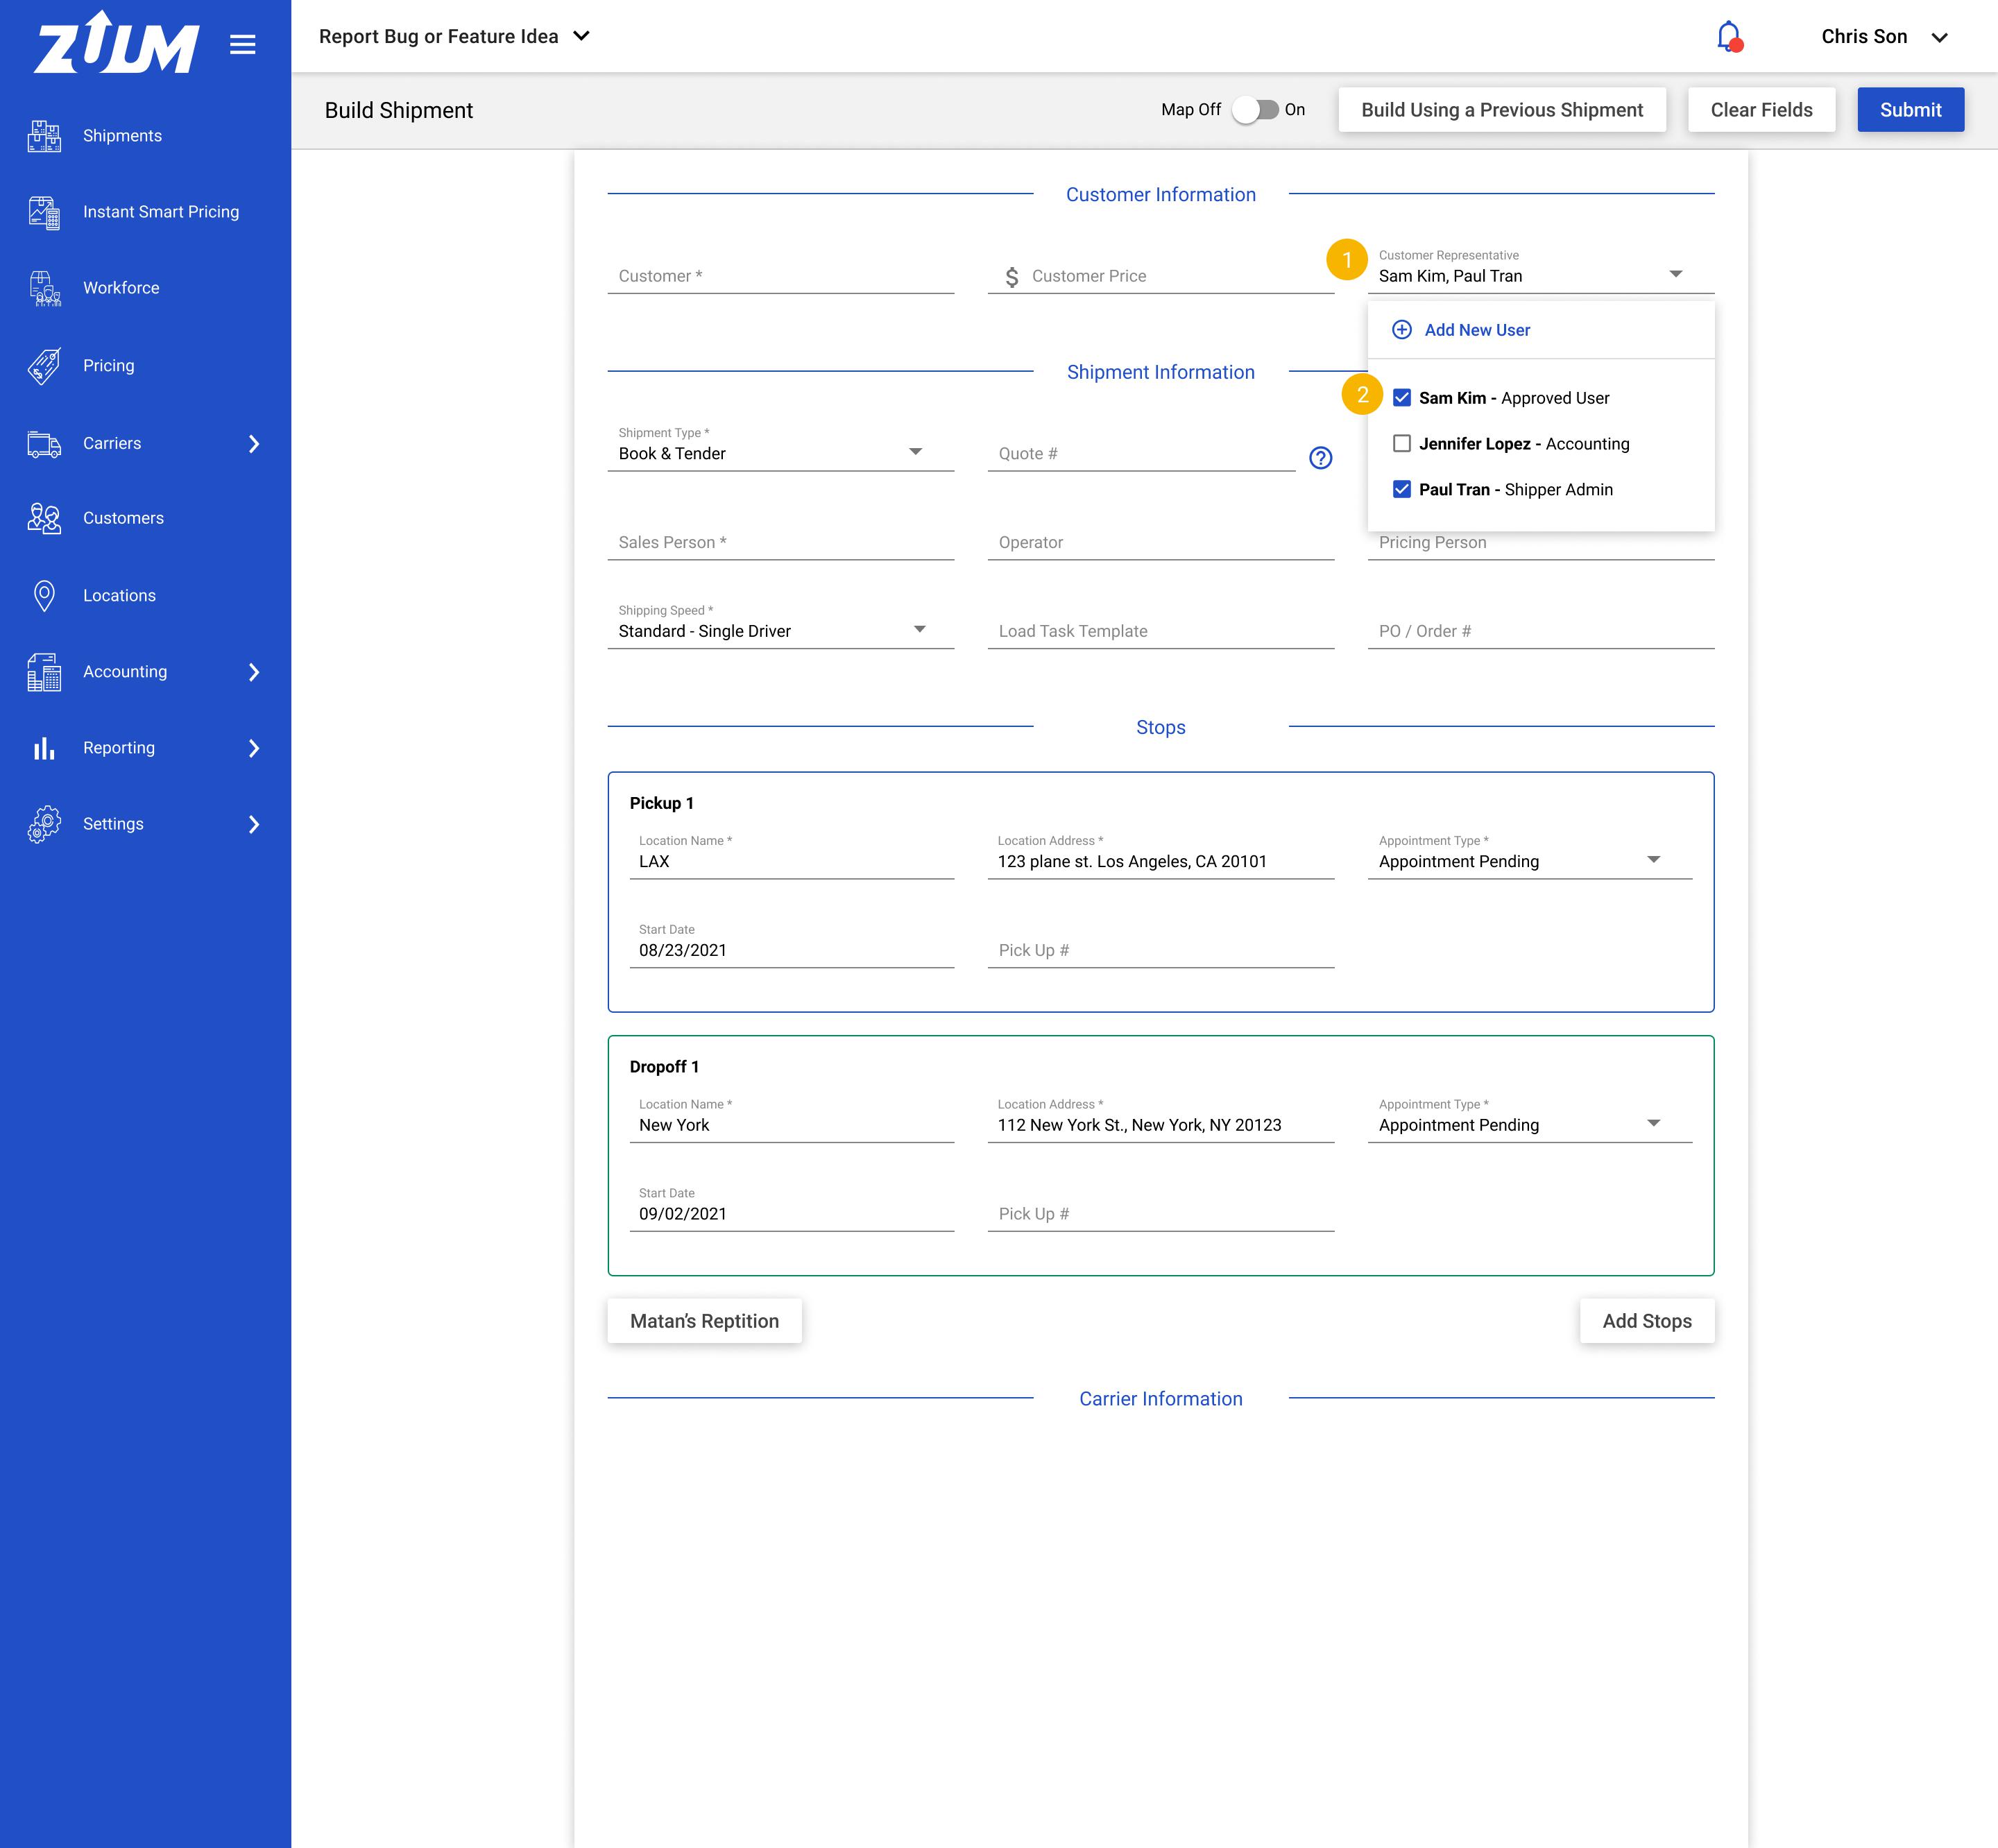
Selected Customer Representative
As you select the user, the selected user’s name will appear on the field
The names will be listed followed by commas. For example:
Chris Son, Sam Kim
Selected User
This is how selected mode looks like
Use Case #2: Adding New User
.jpg?api=v2)
Prototype: here
Step #1: bookShipment_01
Action: Click on the “Customer Representative” field
Step #2: bookShipment_02
Action: Click “Add New User”
Step #3: AddNewUser
Action: Fill out the form and click save
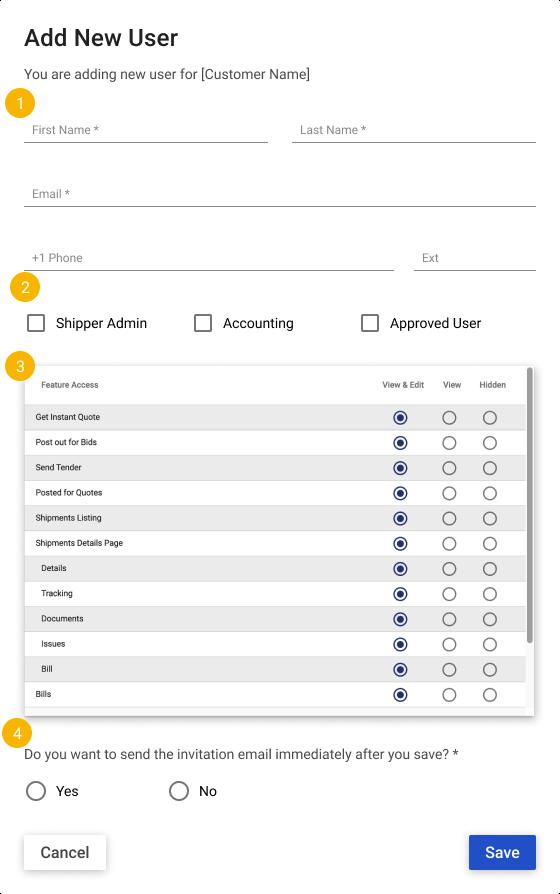
User Information
Please reference the “Add New User” page from the Customer > Team page
Role
These are the same three roles that we have for customer team member details
Permission
This is the same permission modal we have for the Customer > Team page
Invitation Email
This section asks you when do you want to send the invitation email to the new user
Yes - You send the invitation email immediately after you save
No - You have to go to the “Customer > Team” to initiate the email
Save
Once saved, this new user will be selected from the user list modal and will be added to the Customer > Team page
Impacted Screen #1: Shipment > Customer Tab
Prototype: here
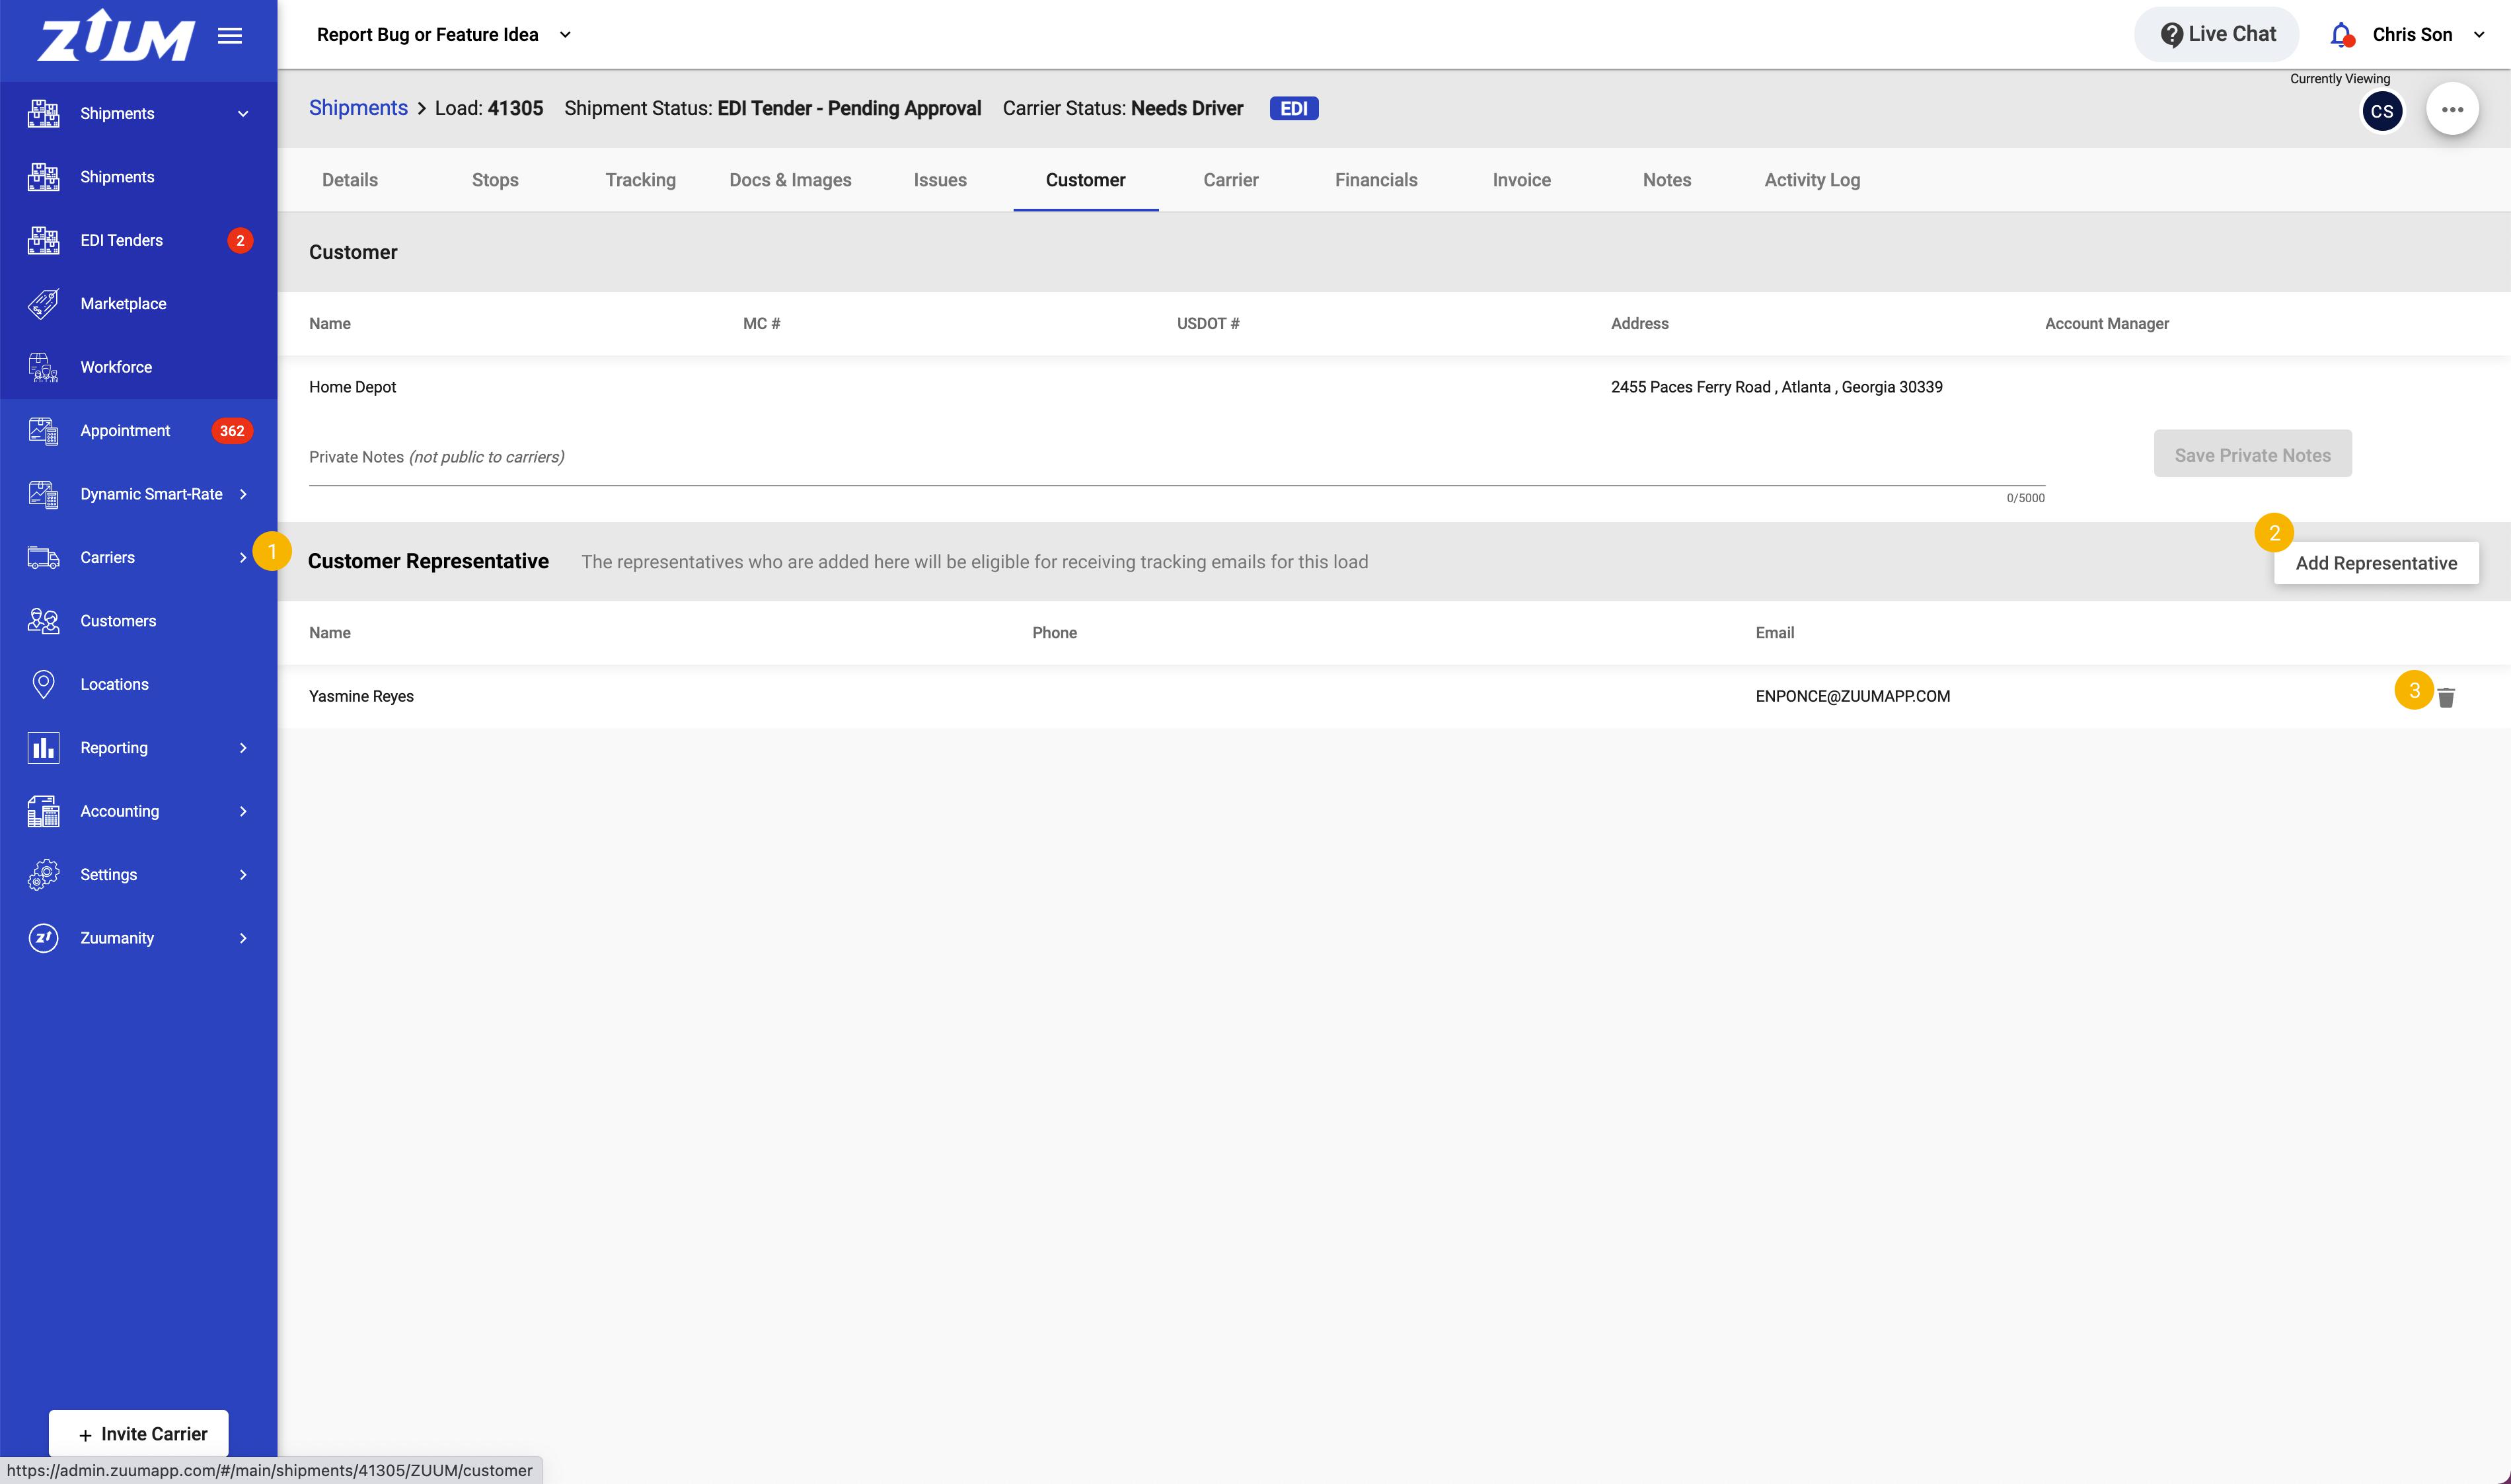
Customer Representative
Instead of Contact, we are calling it “Customer Representative”
Add Representative
This button will give you the same modal that you see on the [Use Case #1 > Step #3]
Delete
This button will give you confirmation modal
Please see the prototype link